How to Make a Waitlist With Google Forms, Tally or Mailchimp (and When You'll Outgrow It)
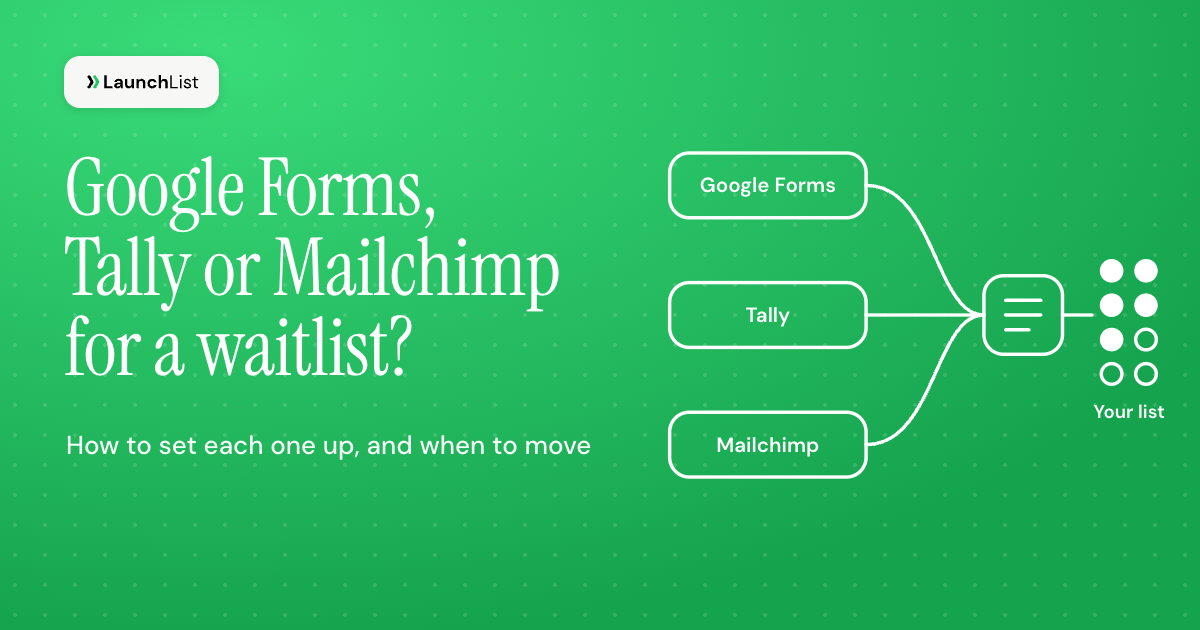
TL;DR: You can make a waitlist with Google Forms, Tally (tally.so) or Mailchimp for free. Choose Google Forms for a quick list in a spreadsheet, Tally for an embeddable form with duplicate prevention and source tracking, or Mailchimp to collect signups and email them later. Mailchimp's Free plan covers 250 contacts; Tally charges for confirmation emails to respondents. None of the three has built-in queue positions or referral links that move people up when friends join. Below are the settings, templates and limits for each.
This guide is for founders launching a product. The aim is to collect interest, learn where signups came from and email people when access opens. Settings and prices were checked against the vendors' pages on November 3, 2026.
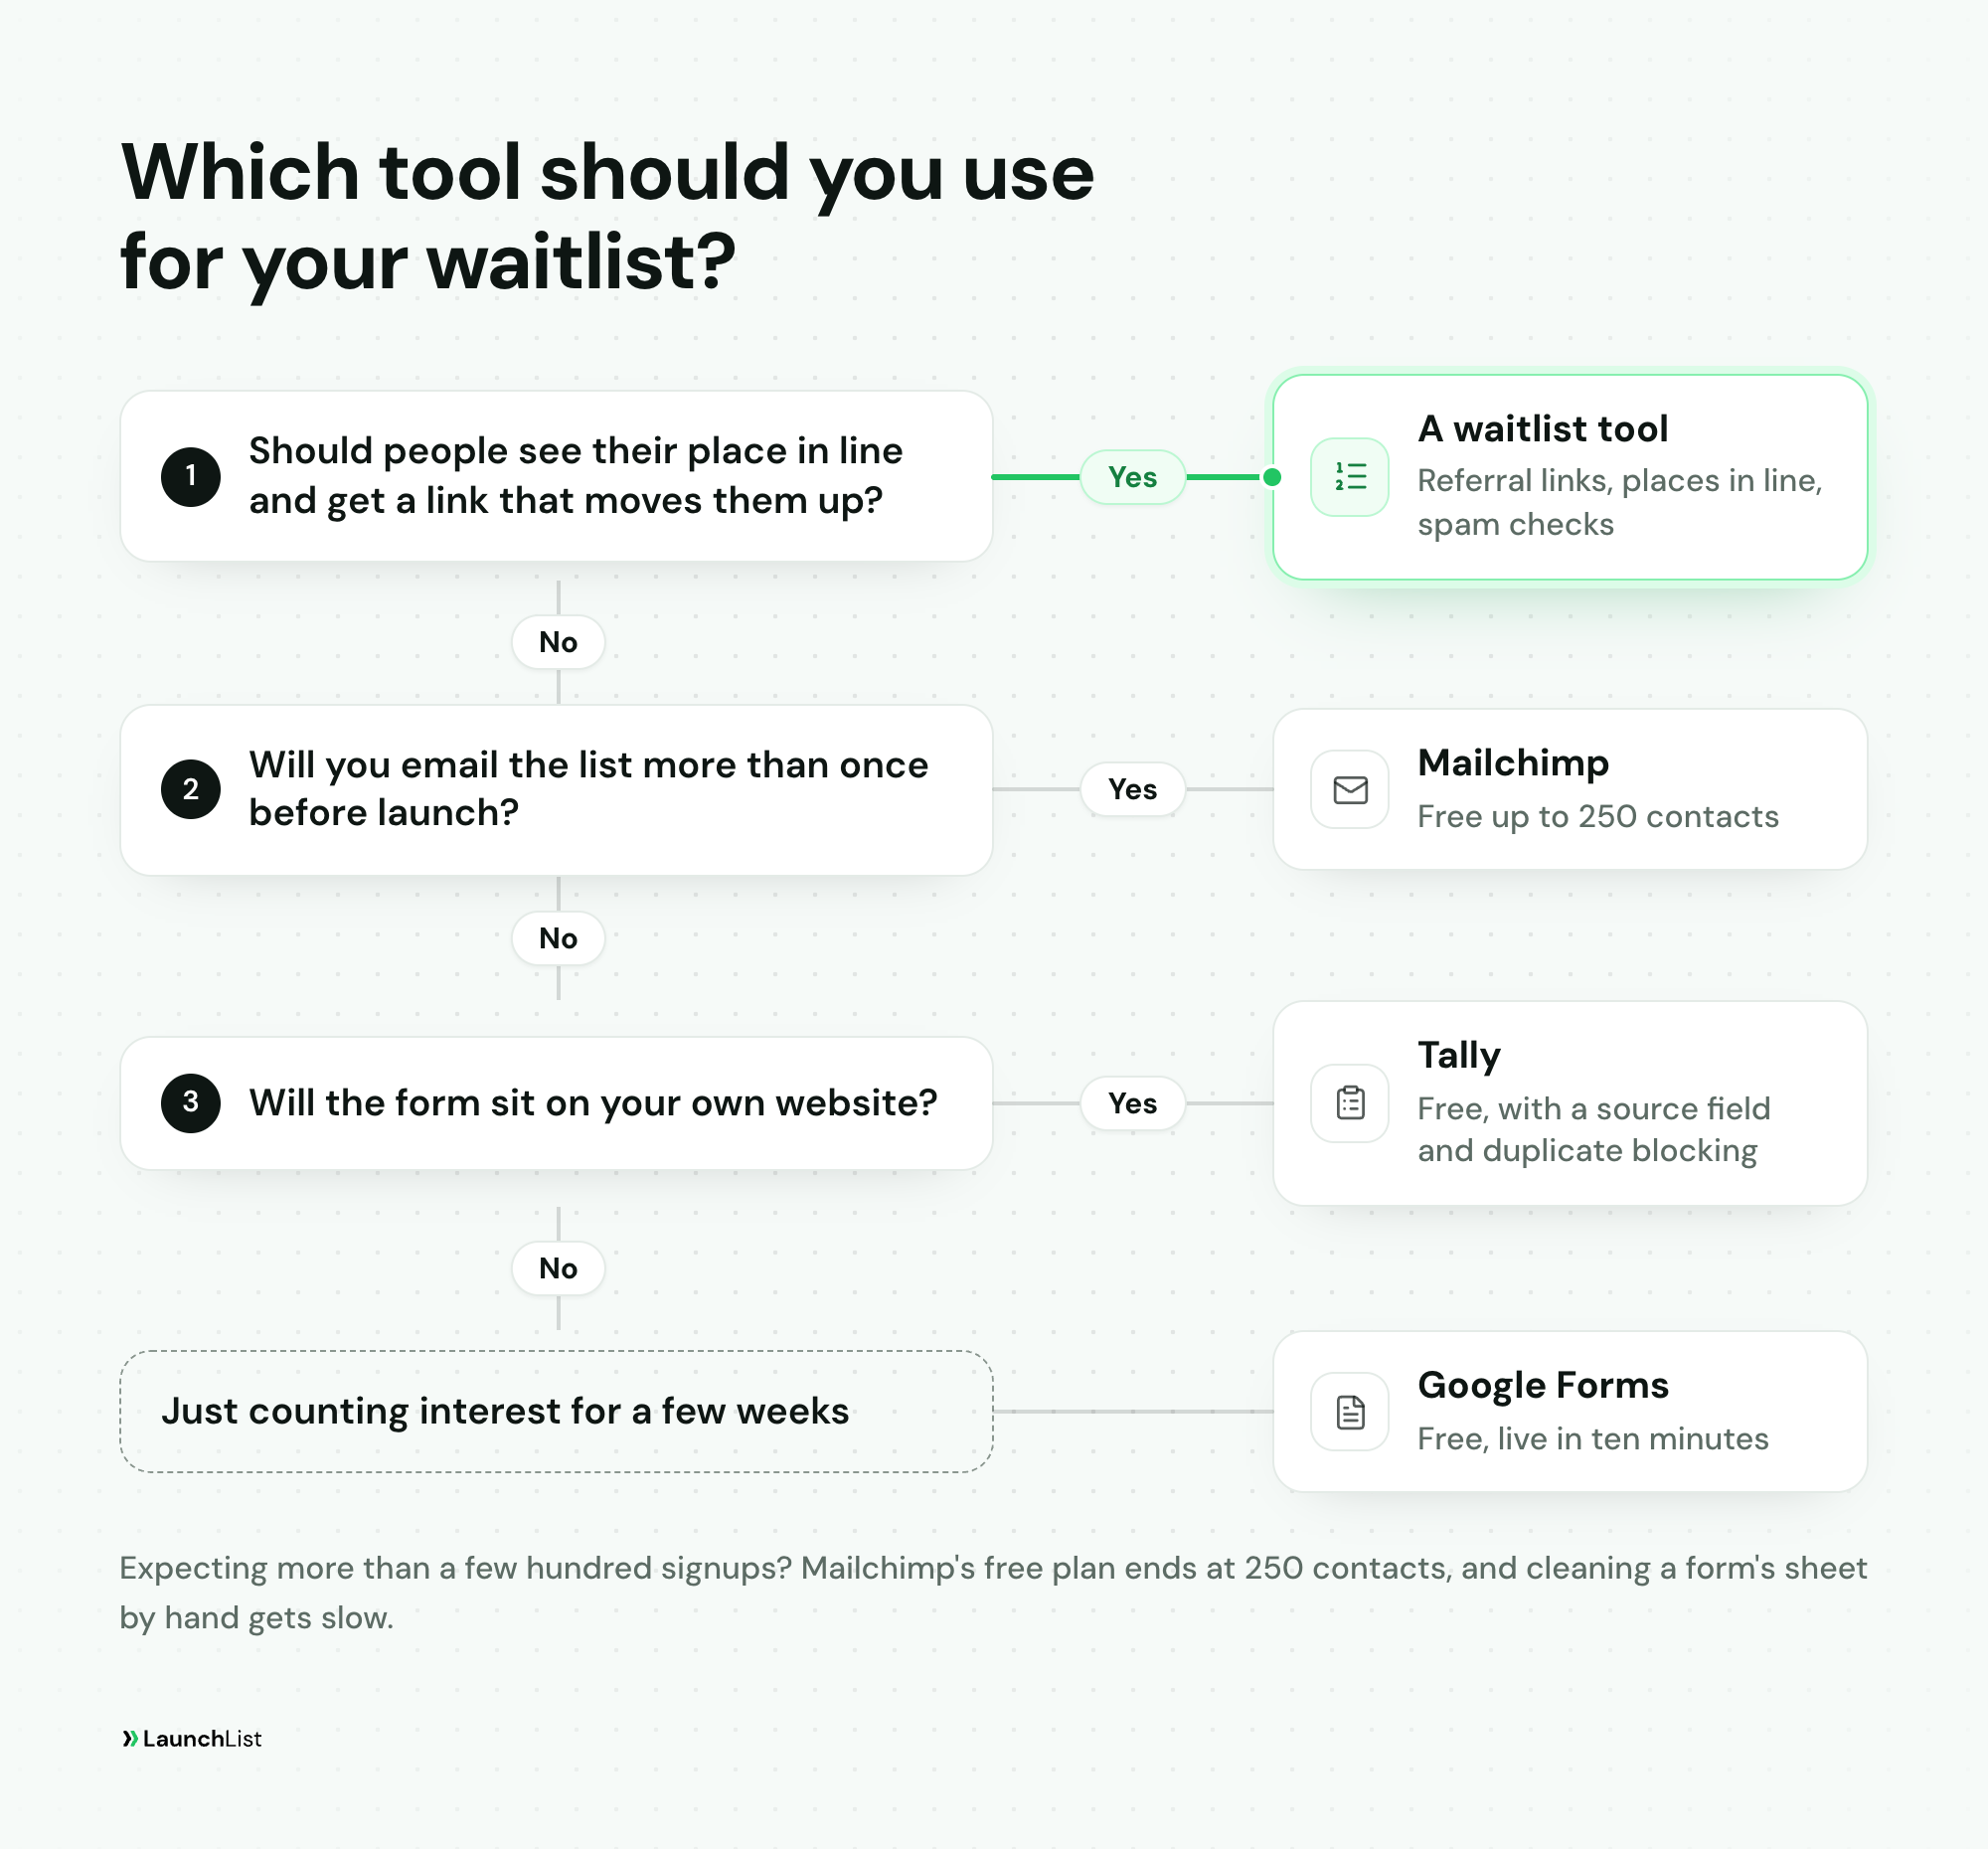
Which one should you use?
- Google Forms if you want it live in ten minutes, you already have a Google account, and you will send the launch email yourself.
- Tally (tally.so, not the accounting software) if the form sits on your own site and you want it to look good, block the same email twice and record which post sent each person.
- Mailchimp if you will email the list more than once before launch and want each address confirmed. Its free plan stops at 250 contacts.
- A waitlist tool if you want each signup to see their place in line and get a referral link, or if you expect more than a few hundred people.
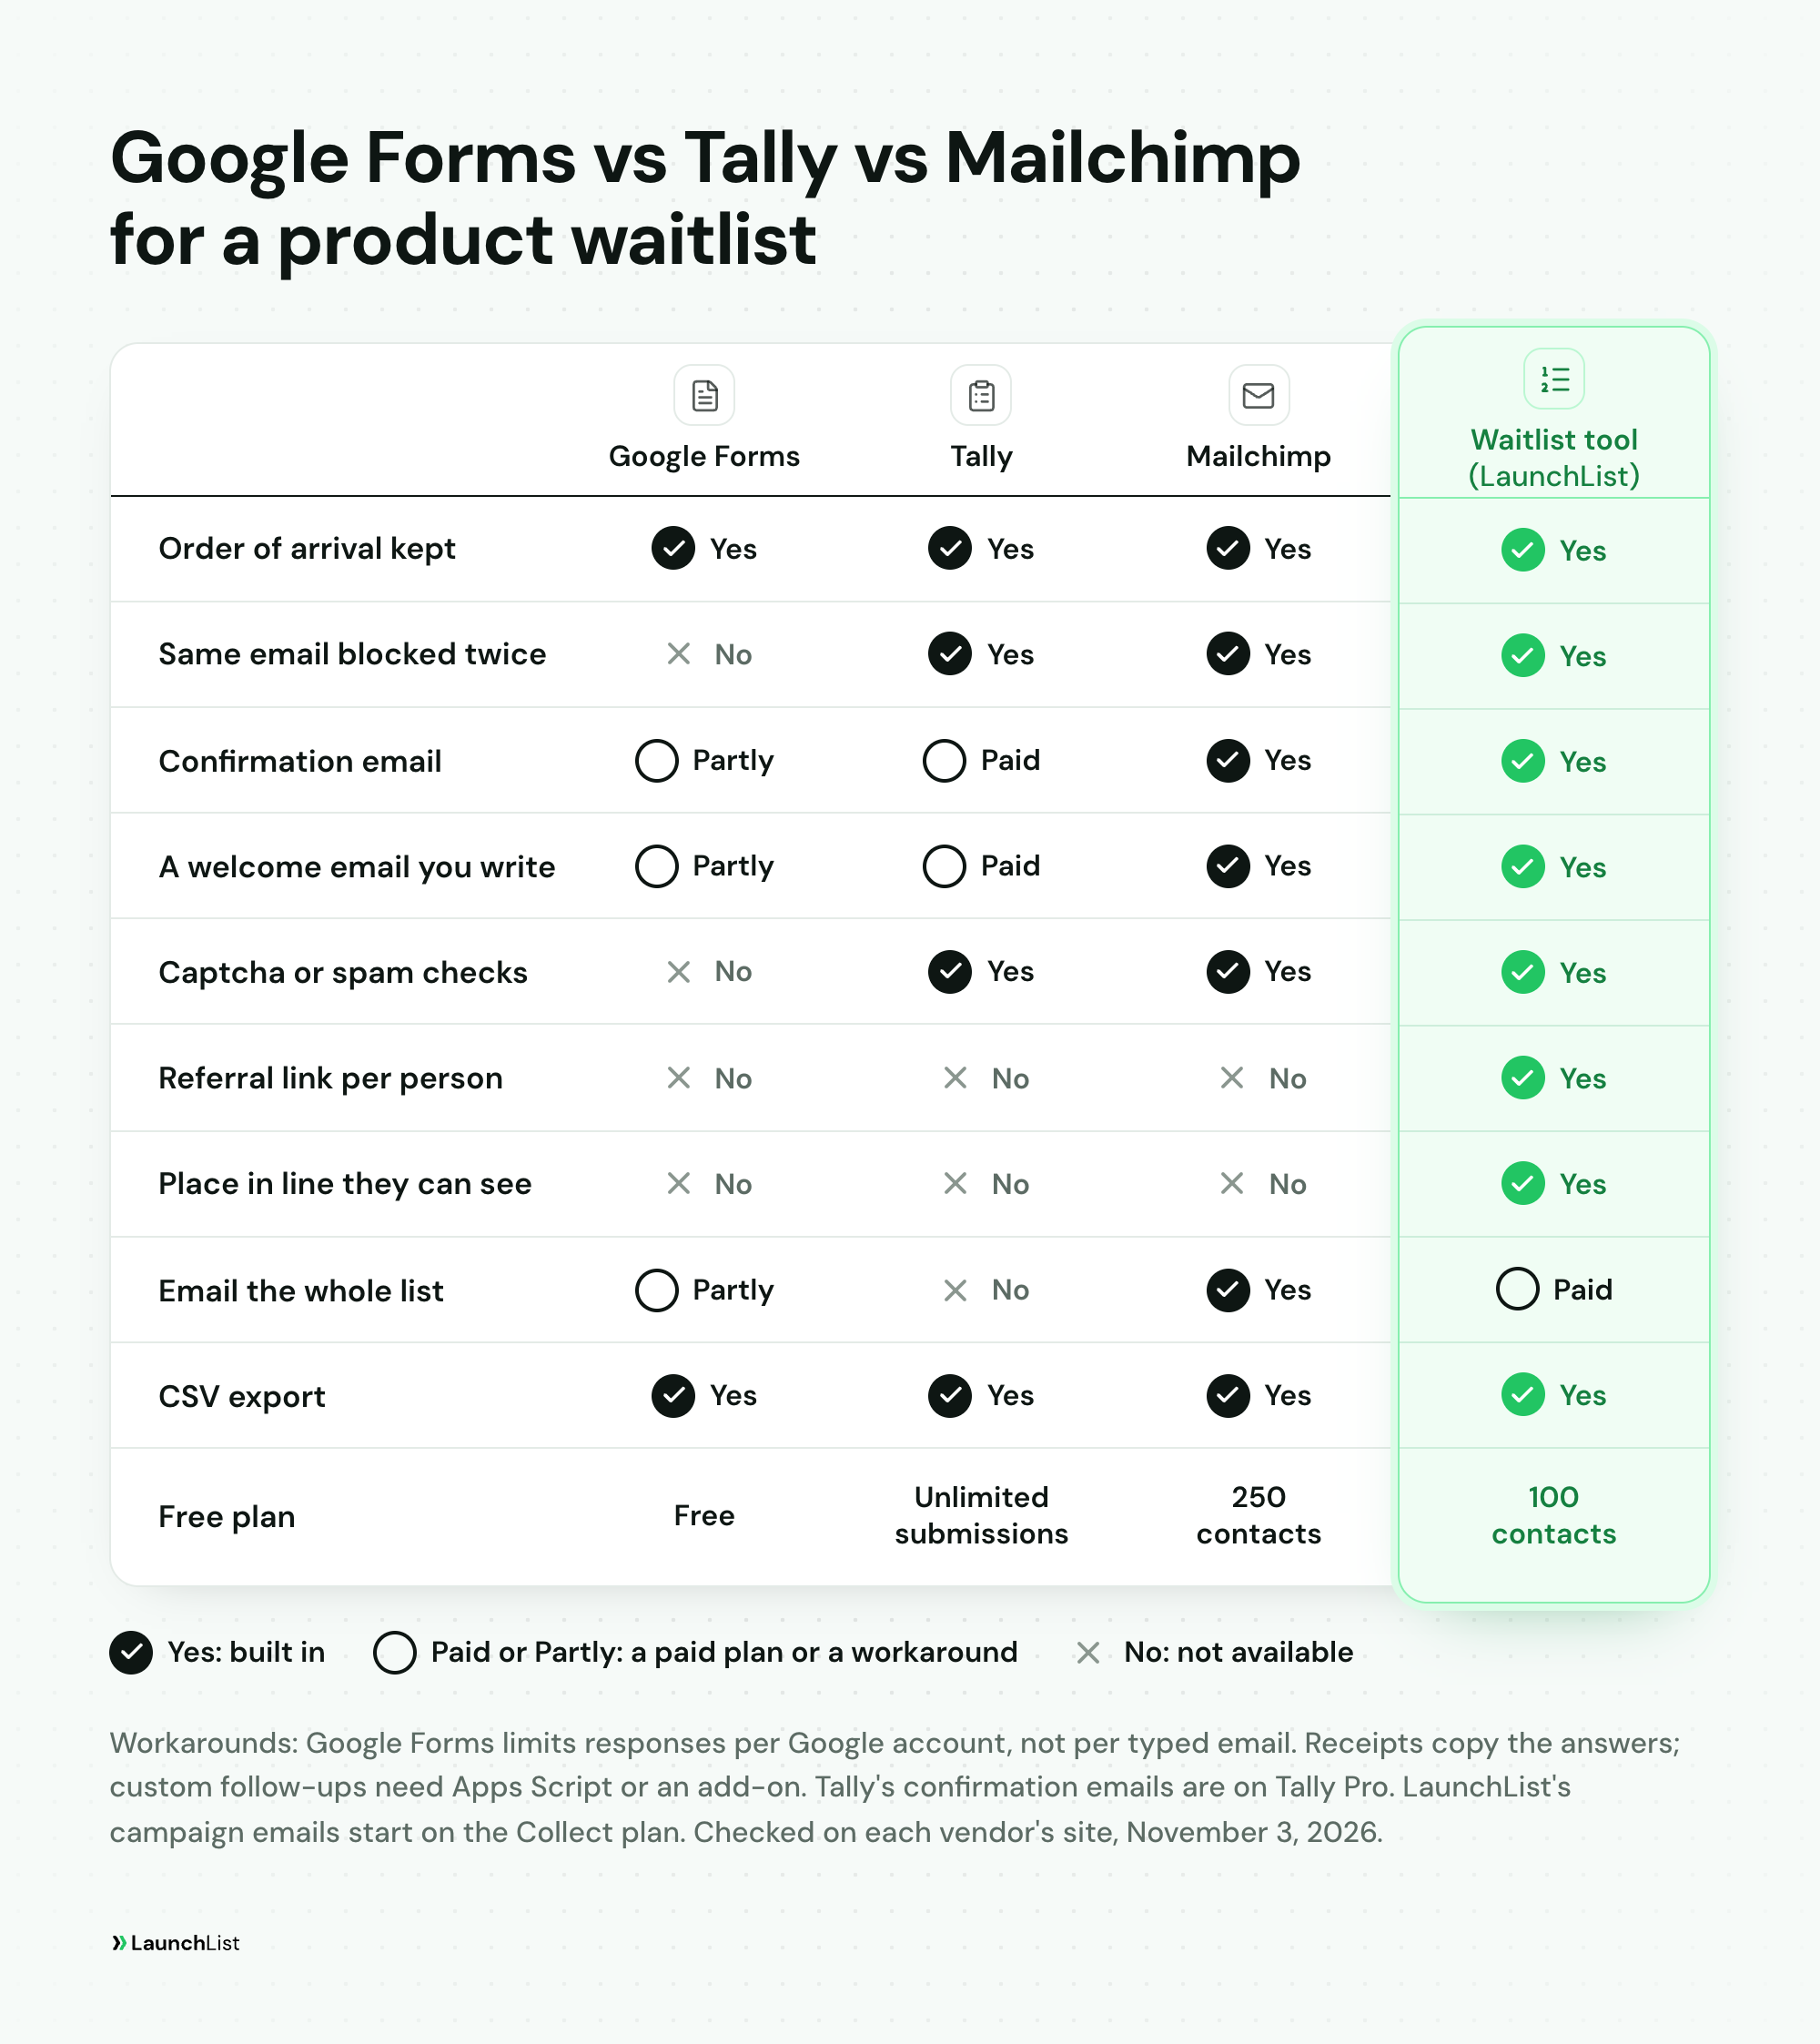
Google Forms vs Tally vs Mailchimp vs a waitlist tool
What each one does with the jobs a product waitlist has, on the plan most founders start with.
| Google Forms | Tally | Mailchimp | LaunchList (a waitlist tool) | |
|---|---|---|---|---|
| Order of arrival | A timestamp on every response | A submission time on every row | Opt-in and confirm times in the export | Kept; each person also sees their place in line |
| Same email twice | Allowed with Responder input; the one-response setting limits Google accounts, not typed emails | Blocked if you turn on duplicate prevention (free) | One contact per address per audience | One contact per address per project |
| Confirmation email | A copy of their answers, if you turn it on | Tally Pro | With double opt-in (off by default) | A verification email, on by default |
| A welcome email you write | Needs Apps Script or an add-on | Tally Pro or Business | Optional final welcome email | On every plan, off until you turn it on |
| Referral link per person | No | No | No | Yes, every plan |
| Place in line | No | No | No | Yes, on each person's status page |
| Spam protection | No captcha setting | reCAPTCHA block (free) | reCAPTCHA | Rate limits, disposable-address detection, device clustering, optional captcha |
| Export | CSV, or a linked Sheet | CSV, or Google Sheets (free) | CSV of the audience | CSV on every plan |
| What it costs | Free | Free; Pro $29 a month ($24 billed yearly) | Free to 250 contacts | Free to 100 contacts; paid plans from $9 a month |
Third-party cells checked on each vendor's own pricing and help pages on November 3, 2026. LaunchList's from its pricing and help docs; beta pricing, subject to change.
How to make a waitlist on Google Forms
To make a waitlist on Google Forms, create a blank form, set it to collect email addresses with Responder input, link the responses to a Google Sheet, and publish it to anyone with the link. It takes about ten minutes and costs nothing with a personal Google account.
Use these settings:
- Create the form. Go to forms.google.com and choose Blank form. Use your product's name as the title and one line in the description: what it is and roughly when you launch.
- Collect the email. Open Settings, expand Responses, and set Collect email addresses to Responder input. Avoid Verified: it collects the email of the person's Google account, so anyone who is not signed in to Google has to sign in first.
- Leave "Limit to 1 response" off. It sits under a heading that says Requires sign in, and that is the catch: Google's help says people "must sign in to their Google Account" to fill the form in. You will get some duplicates; you can remove them in the Sheet.
- Decide on the receipt. Send responders a copy of their response has three choices: Off, When requested and Always. Always sends each person a copy of their answers. It is a receipt, not a welcome email, and Google warns receipts can be stopped by spam filters.
- Write the confirmation message. Expand Presentation and, under After submission, click Edit confirmation message. Say what happens next and when: "You're on the list. We'll email you when early access opens, around March."
- Check the other Presentation settings. Turn off Show link to submit another response and leave View results summary off. Google's publishing guide warns that a results summary can expose full text answers to anyone who can respond.
- Send responses to a Sheet. On the Responses tab, click Link to Sheets. The Sheet is your working list, and its Timestamp column is your order of arrival.
- Get an email per signup if you want one: on Responses, open More options and choose Get email notifications for new responses.
- Publish and share. Click Publish, give general access to anyone with the link, and copy the responder link. To put the form on your site, open the More menu and choose Embed HTML.
To close the list at a number (a beta with 50 seats, say), click Published after publishing, then under Accepting responses choose Set close date or response limit. Google's help adds two details: the number must be higher than the responses you already have, and people who submit at exactly the same moment can go past it.
Google also lists limits of 500,000 responses and 1 GB total storage per form, rolling out from September 2026. A new form stops accepting responses at those limits. Above 100,000 responses, syncing to Sheets can stop working. These are separate from a response cap you set yourself.
A Google Form waitlist template to copy
There is no product waitlist in Google's template gallery, and you do not need one. Build this in a blank form:
Title: "Join the [Product] waitlist". Description: "[Product] helps [audience] do [job]. Leave your email for launch updates and an invitation when early access opens."
| Field | Type | Required |
|---|---|---|
| Collected by Responder input (not a question) | Yes | |
| What do you want it to do for you? | Paragraph | No |
| Where did you hear about us? | Short answer, filled in by your pre-filled links | No |
For the last field, open More, choose Pre-fill form, type a channel name such as reddit, and press Get link. Make one link per place you post. People can see and change the answer, so treat it as a good guess rather than tracking. Keep the form to these three: every extra question costs you signups, and you can ask more later.
What someone sees after pressing Submit
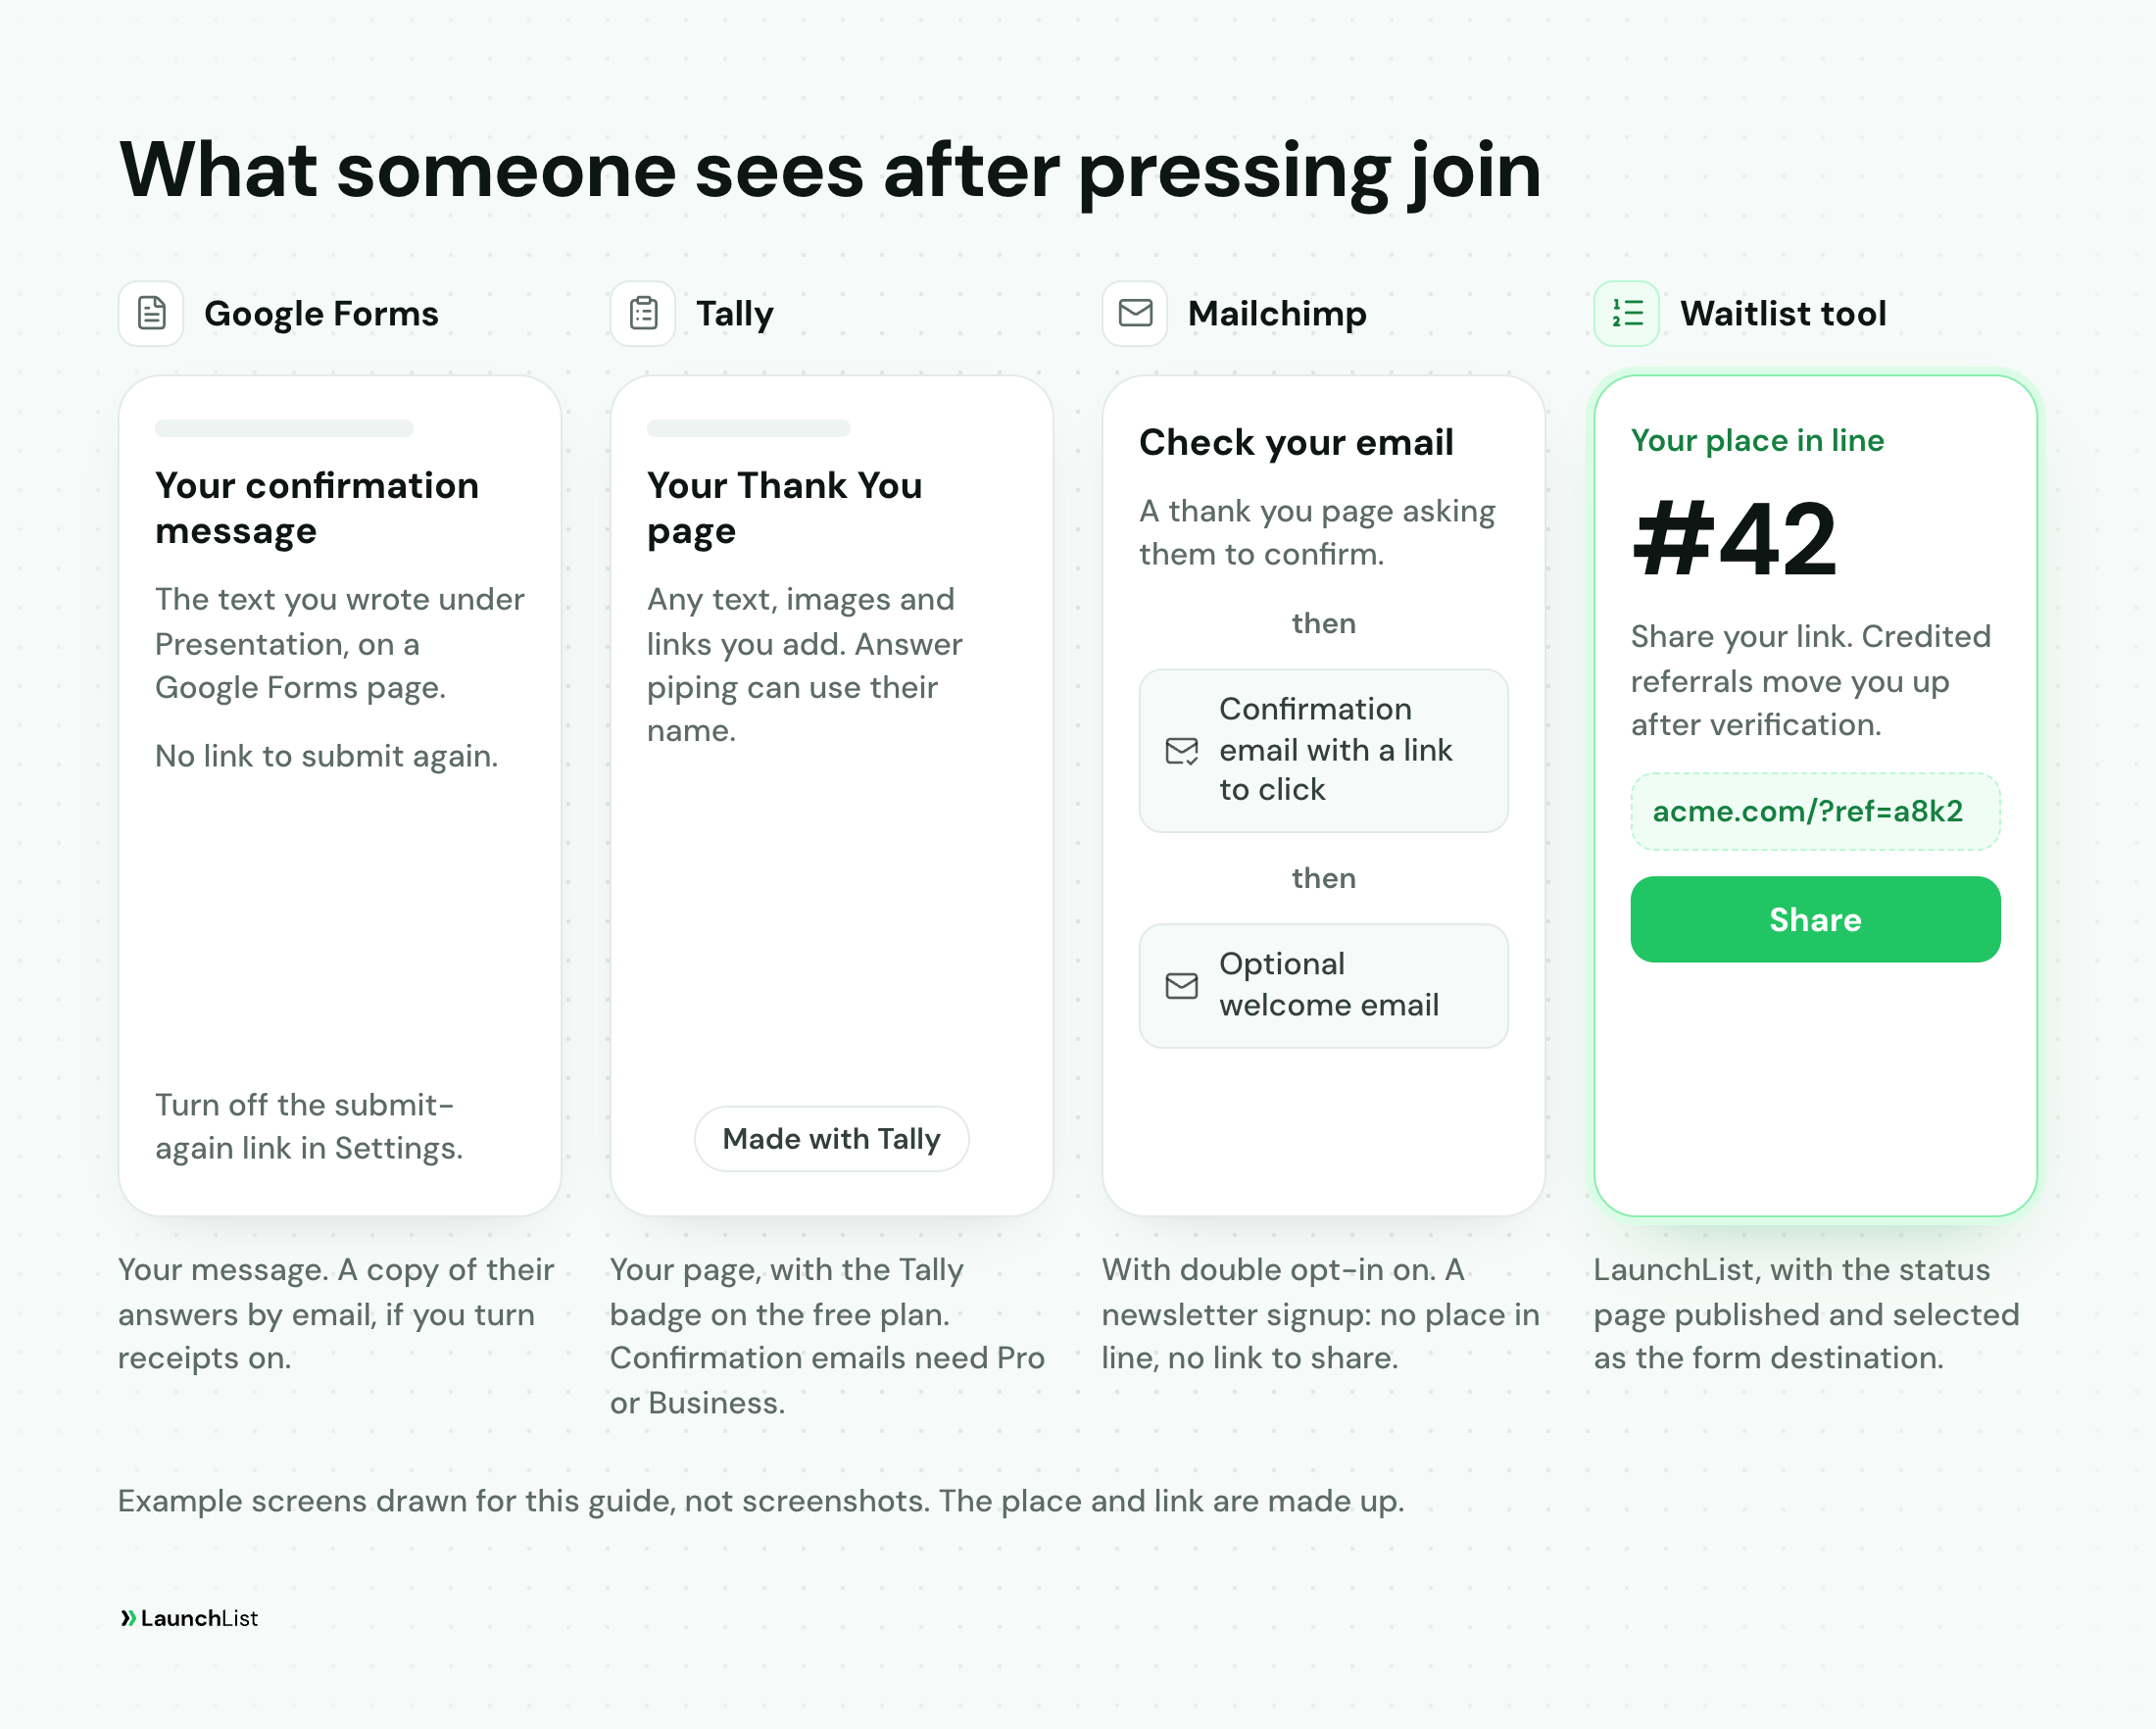
Your confirmation message on a Google Forms page, and a copy of their answers by email if you chose it. They do not get a place in line or a personal referral link.
To email the list later: download the responses as CSV and import the people who opted in into an email tool. Forms has no built-in broadcast sender. Apps Script or an add-on can send custom follow-ups, but Apps Script on a personal Google account is capped at 100 recipients a day. For a launch announcement, an email tool also handles unsubscribes for you.
How to make a Tally waitlist
To make a Tally waitlist, start from Tally's free Product Waiting List template (or a blank form with one email field), add a hidden field for the source, turn on duplicate prevention for the email field, and share the link or embed it. All of that is on Tally's free plan, which has unlimited forms and submissions within its fair use policy.
These steps were checked against Tally's help center and public templates, rather than a signed-in editor:
- Start from the template. Open the Product Waiting List template and press Use this template. It is one page: a headline, a short pitch, a features section with images, a required Your email field and a checkbox, "Yes, I would like to sign up for the waiting list." Replace the sample product with yours and cut what you do not need. There is also a Pro version whose look relies on custom CSS, a Tally Pro feature; on the free plan it still works but looks plainer.
- Record where people came from. Type
/hiddento add a hidden field and name itref. Then share a different link per channel: your form address with?ref=reddit,?ref=newsletterand so on. The value lands with each submission and the person never sees it. - Write the Thank You page. Type
/thankto add one (a free feature) and say what happens next. Without one, Tally shows its default. - Add a captcha. Type
/recaptchaand place it just above the submit button. Tally's reCAPTCHA v2 is free on every plan. - Publish, then block duplicates. In the published form's Settings, under Access, turn on Prevent duplicate submissions and choose the email field. Someone who tries the same email again sees an error page. Per Tally's help, it only counts submissions made after you turn it on, and the message cannot be changed.
- Get notified and keep a sheet. Self email notifications (free) email you on each signup. The Google Sheets integration (free) adds a row per submission, under Integrations, Connect to Google Sheets.
- Share or embed. Copy the form link from the Share tab, or embed the form on your own page.
What needs a paid plan, per Tally's pricing: confirmation emails to the person who signed up (respondent email notifications), sending email from your own domain, removing the Tally badge, a custom domain for the form, and partial submissions are on Tally Pro, $29 a month or $24 a month billed yearly. Verifying that an email belongs to the person who typed it is on Tally Business, $89 a month or $74 billed yearly.
If you enable Pro's respondent email notifications, choose the email field as the recipient and write the subject and message under Settings, Email notifications. Business includes Pro's features. If your usage consistently exceeds Tally's fair use policy, Tally contacts you about a custom plan.
A Tally waitlist template to copy
Whether you start from Tally's template or a blank page, a Tally waitlist form needs only these blocks:
Heading: "Get early access to [Product]". Intro: "For [audience] who want to [job]. Join for progress updates and an invitation when we open." Thank You page: "You're on the list. We'll email you when access opens, around [month]."
| Block | Setting |
|---|---|
| Required, and chosen as the field for Prevent duplicate submissions | |
| One optional question | "What do you want it to do for you?" |
Hidden field ref |
Filled by ?ref= on each link you share |
| reCAPTCHA | Just above the submit button |
| Thank You page | What happens next, and when |
Tally also has a Join the waitlist template built around a series of qualifying questions. Use it only if you need to qualify people before you let them in; for a plain list, keep to one field.
What someone sees after pressing submit
Your Thank You page, with the Tally badge on the free plan. A confirmation email needs Pro or Business and must be enabled. There is no built-in queue position or referral link.
To email the list later: export submissions as CSV or use an integration to send opted-in signups to an email platform. Tally's respondent notifications are per submission, not broadcasts to everyone already on the list.
How to make a waitlist in Mailchimp
To make a Mailchimp waitlist, use your audience's hosted signup form or build a landing page with a Signup Form block, tag the people who join through it, and turn on double opt-in if you want each address confirmed. The Free plan supports up to 250 contacts.
These steps were checked against Mailchimp's help pages, rather than a signed-in account:
- Use one audience and a tag. The cleanest way to create a waitlist on Mailchimp is a tag, not a new list. The Free plan includes one audience: put the waitlist inside it and mark these people with a tag such as
waitlist. - Pick the form. Mailchimp's signup form options are a hosted basic subscribe form that every audience comes with, an embedded form for your own site, a popup form, and a landing page with a Signup Form content block. For a waitlist with nowhere else to live, the landing page is the closest thing to a waitlist page.
- Build the landing page. Click Create, then Landing Page, name it and choose the audience. The audience cannot be changed after you publish. Pick a template and keep or add the Signup Form block.
- Tag everyone who joins. In the landing page builder, under Audience and tags, add up to five tags.
waitlistis the one that matters. - Turn on double opt-in. Mailchimp audiences are single opt-in by default (some EU accounts start on double). With double opt-in, each person gets a confirmation email and only joins the audience after clicking its link. You change it in the audience's settings, and you design the confirmation email, the thank you pages and an optional final welcome email in the form builder.
- Turn on reCAPTCHA in Forms settings, under Audience-wide defaults. It cannot be used on popup forms.
- Preview, then publish. Replace the template's sample copy and check the signup fields. The page goes live on a free Mailchimp address. Mailchimp says its landing pages are not indexed by search engines; share the link yourself. A custom domain needs a paid Mailchimp Websites plan.
The Free plan's limits, from Mailchimp's plan guide: 250 contacts, 500 sends a month and no more than 250 a day. Subscribed, unsubscribed and non-subscribed contacts count toward the 250. Past it, Mailchimp keeps collecting signups but holds your live and test emails until you upgrade or reduce the contact total. Test emails use the sending allowance too.
A Mailchimp waitlist template to copy
A Mailchimp waitlist form needs very little; the settings around it do the work:
Page headline: "Be first to try [Product]". Form copy: "Get product updates and an early access invitation by email." Welcome email: "Thanks for joining. We're building [one-sentence description] and expect to open access around [month]. Reply and tell us what you need most."
| Part | Setting |
|---|---|
| Form fields | Email (required), first name (optional) |
| Tag | waitlist, added by the landing page |
| Opt-in | Double opt-in on |
| Confirmation email | Says what they signed up for, so the click feels expected |
| Final welcome email | On: one paragraph on what happens next |
| reCAPTCHA | On |
What someone sees after pressing subscribe
With double opt-in on: a thank you page asking them to check their email, then the confirmation email, then a second thank you page once they click, then your welcome email if you turned it on. It is a newsletter signup, with no queue position or personal referral link.
To email the list later: under Audience, Tags, find waitlist and choose a regular email from its menu (Mailchimp's tag guide). Write the update or launch announcement, check the subscribed recipients and your remaining sends, and send a test before the campaign. A tag keeps the waitlist separate from people who only joined your newsletter.
Other tools founders try
- Typeform. A Typeform waitlist asks one question at a time, which reads well on a phone. Its plans are priced by responses, starting with 100 a month on Basic, per Typeform's pricing, which a waitlist can run through in a day. Fine for a qualifying survey, an expensive way to collect emails.
- Airtable. An Airtable waitlist is a base with a form, a sortable list and statuses you change by hand. The Free plan holds 1,000 records per base and includes 100 automation runs a month, per Airtable's pricing. It suits manual invite management; use a separate email tool for your launch announcement.
- Notion. Notion forms are on every plan, and answers land in a database. Share it with Anyone on the web with link. If you use a Notion waitlist template from someone else, rebuild the form inside your copy: Notion warns that a form in a duplicated template can send responses to the original creator.
- Kit or beehiiv. Newsletter tools with a signup form built in. Kit's free plan goes up to 10,000 subscribers and its newsletter referral system is on its Pro plan (Kit pricing). beehiiv's free plan goes up to 2,500 subscribers (beehiiv pricing) and it has a newsletter referral program. Both fit if the waitlist is really the first issue of a newsletter.
- A waitlist spreadsheet template. If you collect by hand (at an event, from DMs), a sheet with these columns does the job: Timestamp, Email, Name, Source, Referred by, Status (waiting, invited, joined), Invited on. Sort by Timestamp and never retype it.
Where each one stops
Plan for these jobs beyond collecting addresses:
- Showing a place in line. None of the three gives respondents a live queue position.
- Crediting referrals. Tracking who brought whom, awarding credit and moving people up needs another tool or your own code.
- Keeping fakes and doubles out. Google Forms limits Google accounts if you require sign-in, but does not deduplicate a typed email field. Tally can block a repeat email, IP address or browser, and Mailchimp keeps one contact per address per audience. A captcha or duplicate check alone does not establish that a referred friend is a different person.
- Knowing which post worked. Use Tally's hidden field, a visible pre-filled question in Google Forms, or Mailchimp tags for separate signup pages.
- Emailing everyone at launch, from your own address, with an unsubscribe link. Mailchimp does this, within its limits; the two form builders do not.
- Letting people in a batch at a time. Picking the first 50, sending each a way in and seeing who used it is a spreadsheet project in all three.
When you'll outgrow it: five signs
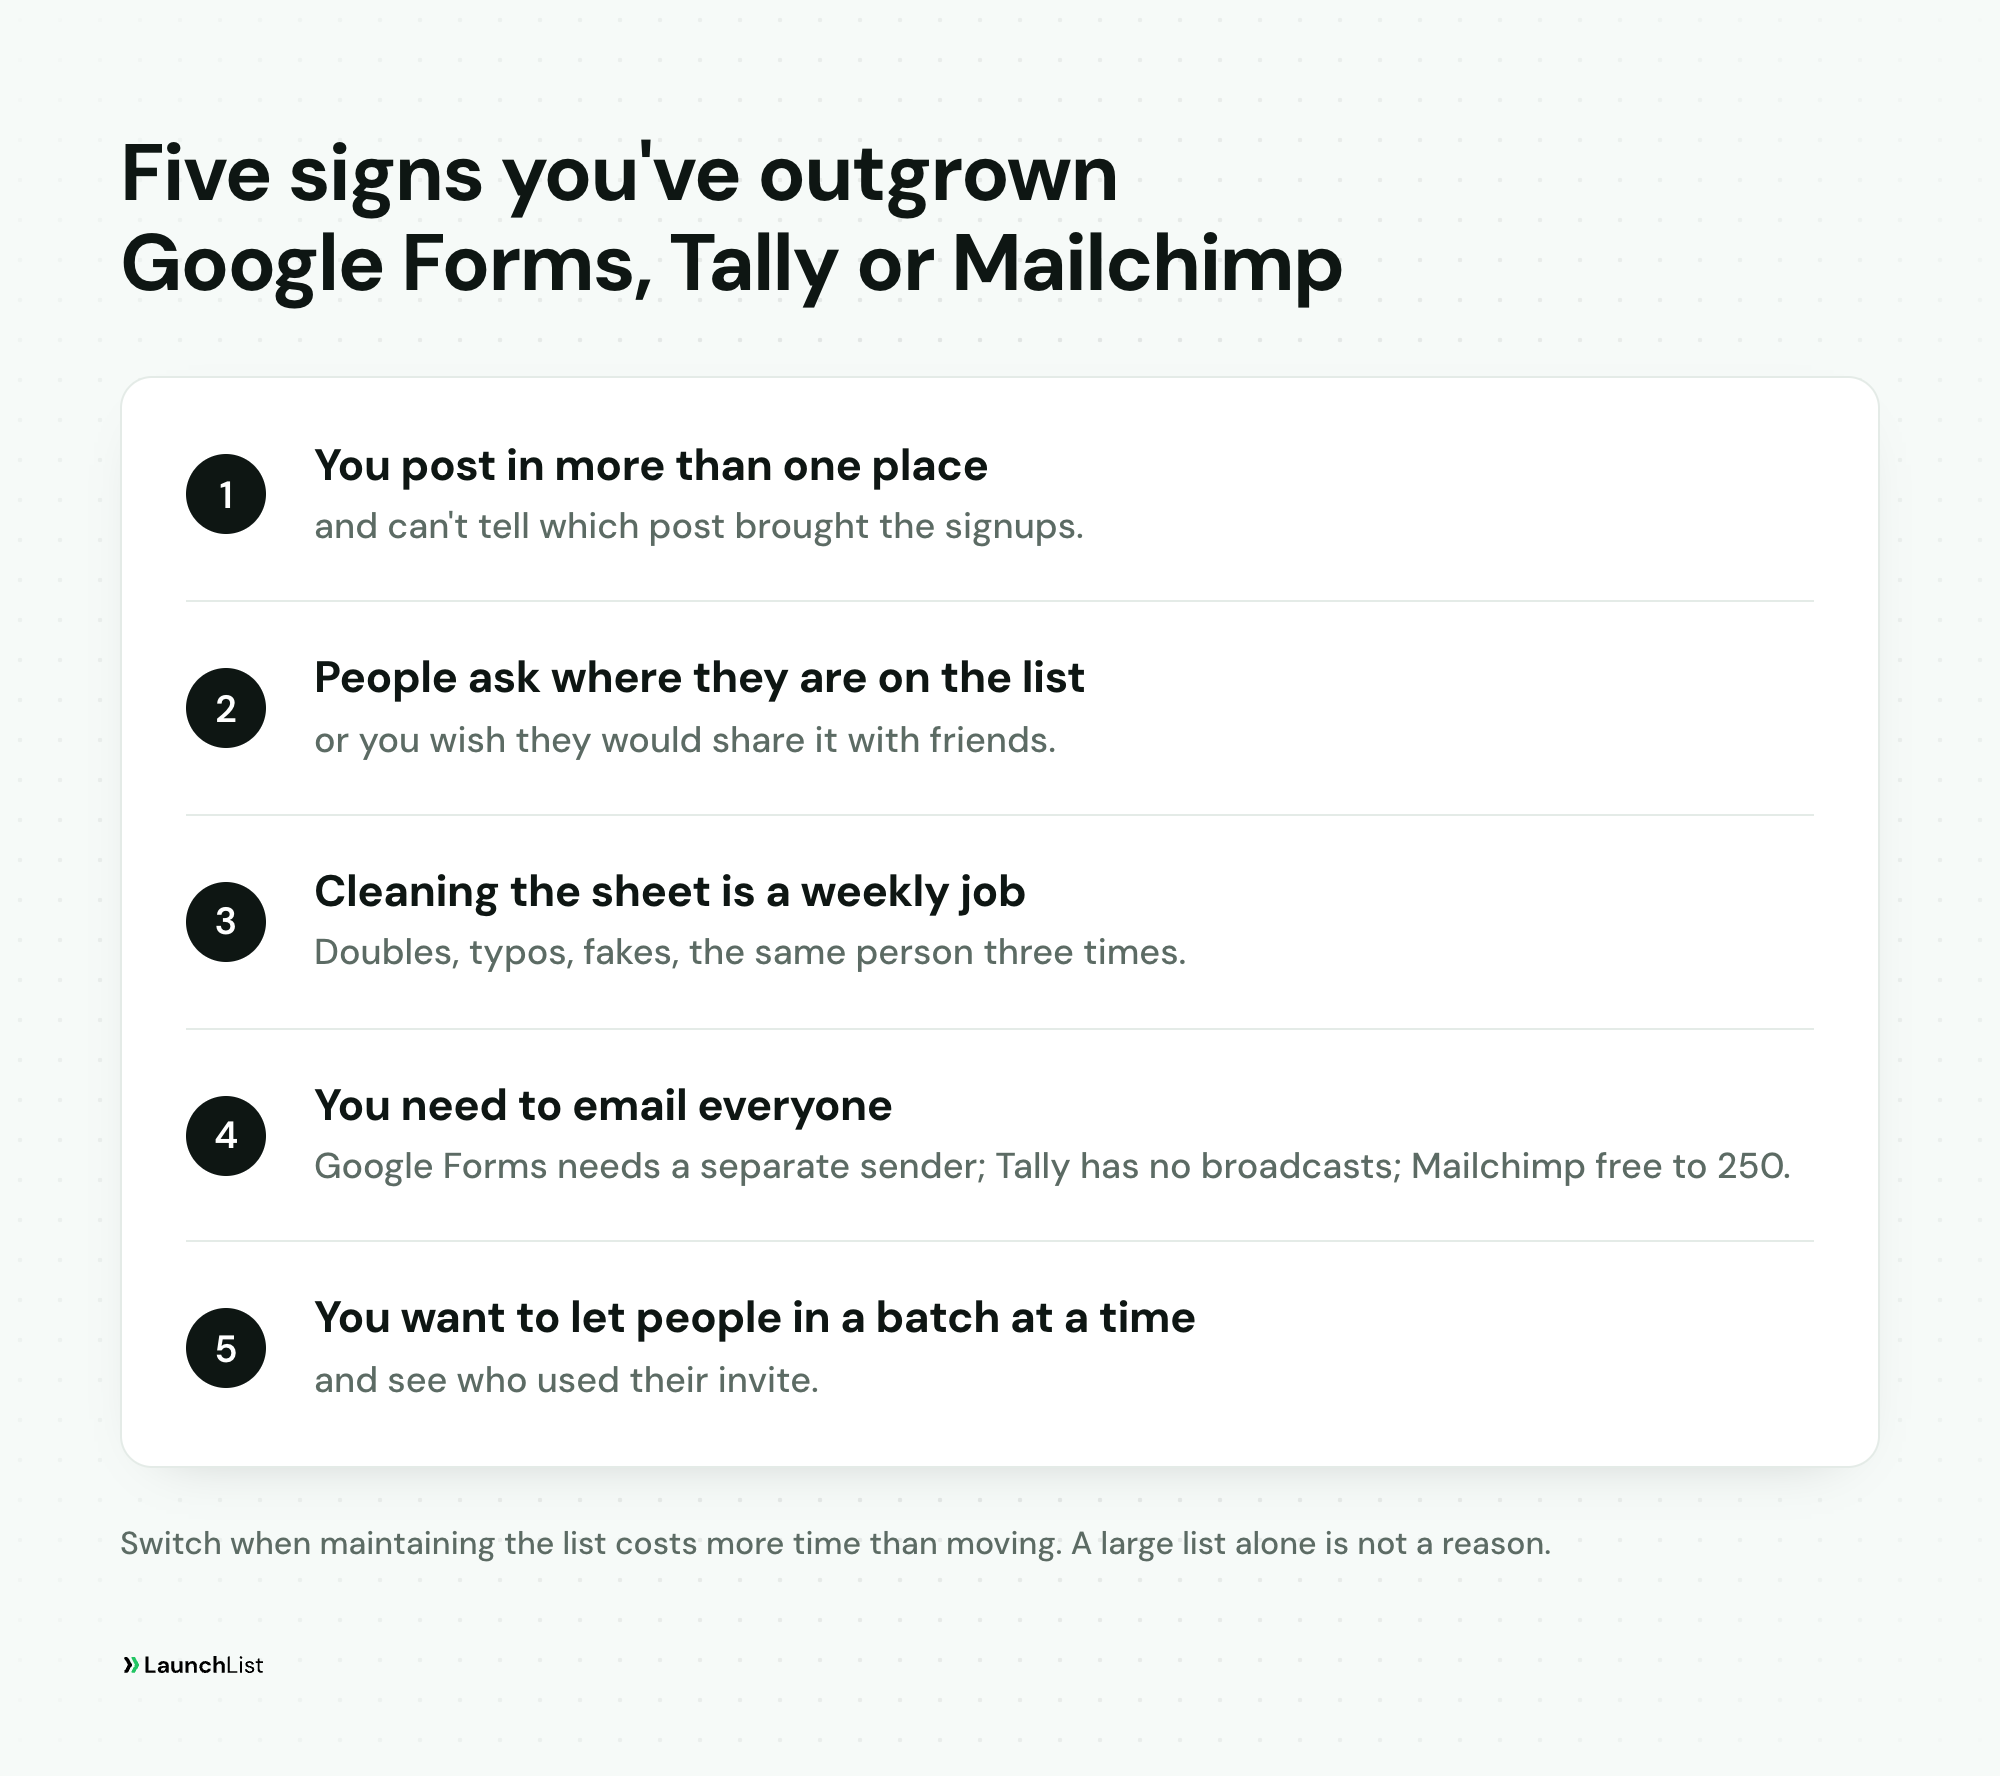
- You post in more than one place and cannot say which one brought the signups.
- People ask where they are on the list, or you catch yourself wishing they would share it.
- Cleaning the sheet is a weekly job: doubles, typos, obvious fakes, the same person three times.
- You need to email everyone, and Google Forms can only do it through Apps Script, Tally cannot do it at all, or Mailchimp's free plan has run out at 250 contacts.
- You want to let people in a batch at a time, and track who used their invite.
Switch when the work these gaps create costs more time than moving. List size alone is not a reason: a large Tally list can still work well with a separate email platform.
Moving the list to a waitlist tool without losing anyone
Keep the original signup dates, answers and permission to email each person. A clean CSV moves quickly; check those columns before importing.
Export first:
- Google Forms: on the Responses tab, open More and choose Download responses (.csv).
- Tally: on the Submissions tab, download the CSV.
- Mailchimp: export the waitlist tag, rather than your entire newsletter audience. The export can contain separate files for subscribed, unsubscribed, non-subscribed and cleaned contacts. Keep those states separate.
OPTIN_TIMEis populated for completed single opt-in;CONFIRM_TIMErecords the double opt-in click (Mailchimp's export help).
Then, in LaunchList (the steps are in the import guide):
- Open Audience, then Signups, and press Import. A file can be up to 50 MB or 250,000 rows.
- Map the email column to Email. The importer recognizes the usual names.
- Map the date column (Timestamp in Google Forms, the submission time in Tally, or the populated opt-in date in Mailchimp) to Joined date. LaunchList sorts the queue by points, with signup time breaking ties. Dates preserve arrival order among people with equal points, not a fixed queue number. Use an unambiguous year-first timestamp such as
2026-10-03T14:30:00Z; check the timezone too. An unparseable or future date falls back to import time. - Leave the other columns in. Anything that does not match a LaunchList field is kept on the contact as a custom field, including answers like "Where did you hear about us?".
- Choose what happens to people already in your list (skip them, the default, or update them), and say whether these people asked to hear from you. For a mixed export, map Subscription per row. Keep unsubscribed people unsubscribed; do not mark the entire file as subscribed.
Nobody is emailed by an import: no verification email, no welcome email. The Free plan covers 100 contacts across the workspace; contacts past the plan size are saved but hidden, never deleted. Importing creates each person's referral code and status-page access, but does not verify their email. A campaign filtered to Verified email leaves them out; choose Verified or not to include imported people who consented. Campaigns require Collect or above. What to do after launching your waitlist covers the next steps.
Keeping Mailchimp. You can export a CSV from LaunchList on every plan and import it into Mailchimp, or connect them through Zapier, Make or a webhook; exporting to an email tool explains the options. The Google Sheets app, on Launch and Grow, adds visible signups as rows. Test signups, contacts hidden past your plan size and signups held for review are left out; approved signups are added after review. Rows do not update when a signup changes.
What a waitlist tool does with the same signup
This is where LaunchList fits, so here is exactly what changes, from its help docs:
- A place in line and a link of their own. Publish your status page and choose it as the form's after-signup destination. New signups see their place and referral link there. Credited referrals earn points and move the person who shared the link up. These features are on the Free plan.
- One email, one entry. The same email twice is one contact; the second try sees "You're already on the list."
- A verification email, on by default. With verification enabled, a referral counts after the friend clicks the verification link. You can turn verification off per form, or hold referral credit until verification separately in project settings.
- Spam protection without a sign-in wall. Layered protection includes rate limits, disposable-address detection and device clustering, and you can add your own captcha keys. The spam and trust guide explains what is held for review and why.
- A source field that stays hidden. A hidden field fills from the link you share, like Tally's.
- The same form on your site. Embed it on your own page (how to add a waitlist to your website) or use the hosted launch page.
It is free for your first 100 contacts, with no card. Campaign emails start on Collect, from $9 a month for 500 contacts. Welcome emails are available on every plan and off by default; sending from your own domain requires Launch or Grow (pricing). For other dedicated tools side by side, see the best free waitlist software or LaunchList compared.
Stick with Google Forms, Tally or Mailchimp if...
- Stick with Google Forms if you are testing whether anyone cares at all, the list will stay in the low hundreds, and you will email those people yourself. Ten minutes and no new account is a real advantage.
- Stick with Tally if the form lives on a site you already have, you want it to look like your brand, and you will move the list to an email tool when launch comes. Its free plan is generous, and the hidden field plus duplicate prevention covers more than most founders need for a first test.
- Stick with Mailchimp if the waitlist is really a newsletter: you will write to people every couple of weeks, you will stay under 250 contacts or pay for the next tier, and nobody needs a place in line.
- Stay with what you have if your launch is a few weeks away and the list works. Moving is quick, but the weeks before a launch are better spent writing to the people on the list.
Frequently asked questions
How do I make a waitlist on Google Forms?
Start a blank form, choose Settings, Responses, then Collect email addresses: Responder input. Leave Limit to 1 response off to avoid Google sign-in. Write a confirmation message, leave View results summary off, link responses to a Sheet, and publish to anyone with the link. Share the responder link or use More, Embed HTML.
Is there a Google Form waitlist template?
The Google Forms gallery has no product waitlist template. In a blank form, collect the email through Responder input, add one optional question about what people need, and optionally add a source question filled by a different pre-filled link per channel. The template above lists the fields and settings.
Can Google Forms send a confirmation email?
It can email a copy of the answers if you collect emails and set Send responders a copy of their response to Always. Receipts can be stopped by spam filters. Custom follow-ups need Apps Script or an add-on; broadcasts to the list need a separate setup. Apps Script on a personal Google account is limited to 100 email recipients a day.
Can a Google Form stop taking signups after a set number?
Yes. After publishing, click Published, then under Accepting responses choose Set close date or response limit. The number must exceed the responses already received. Google warns that simultaneous submissions can go past the limit.
Is Tally free for a waitlist?
Yes. Tally's free plan includes unlimited forms and submissions within its fair use policy, a custom Thank You page, duplicate prevention, reCAPTCHA, hidden fields and Google Sheets integration. Respondent confirmation emails need Pro or Business. Pro costs $29 a month or $24 a month billed yearly.
Can Tally send a confirmation email to people who join?
Yes, on Pro or Business through Respondent email notifications. Enable it in the published form's settings and select the email field as recipient. Free self notifications email the form owner. Verify email, which checks ownership before submission, requires Business.
How do I make a waitlist form in Mailchimp?
Use one audience and a landing page with a Signup Form block. Add a waitlist tag under Audience and tags, enable double opt-in in the audience settings, and turn on reCAPTCHA under Forms settings, Audience-wide defaults. Replace the template copy, preview and publish. A hosted basic subscribe form or embedded form also works.
Is Mailchimp free for a waitlist?
Up to 250 contacts. The Free plan includes one audience, 500 sends a month and at most 250 a day. Unsubscribed and non-subscribed contacts count too. Above 250, you can still collect contacts, but live and test sends are held until you upgrade or reduce the contact total.
How do I move a Google Forms waitlist to a waitlist tool?
Download the CSV from Responses, More, Download responses (.csv). In LaunchList, open Audience, Signups, Import. Map Email and Joined date, preserve subscription status and confirm the duplicate setting. Signup time breaks ties between people with equal points. Imports send no email and skip existing contacts by default.
Related reading
- The best free waitlist software in 2026: dedicated waitlist tools compared, free plans first.
- How to add a waitlist form to your website: the embed side, for any site builder.
- What to do after launching your waitlist: the first 48 hours once the list is live.