Webflow Waitlist Integration
Add a viral pre-launch waitlist to your Webflow site in under 5 minutes. You will need a paid Webflow plan to add custom scripts.
Step 0 - Get form key
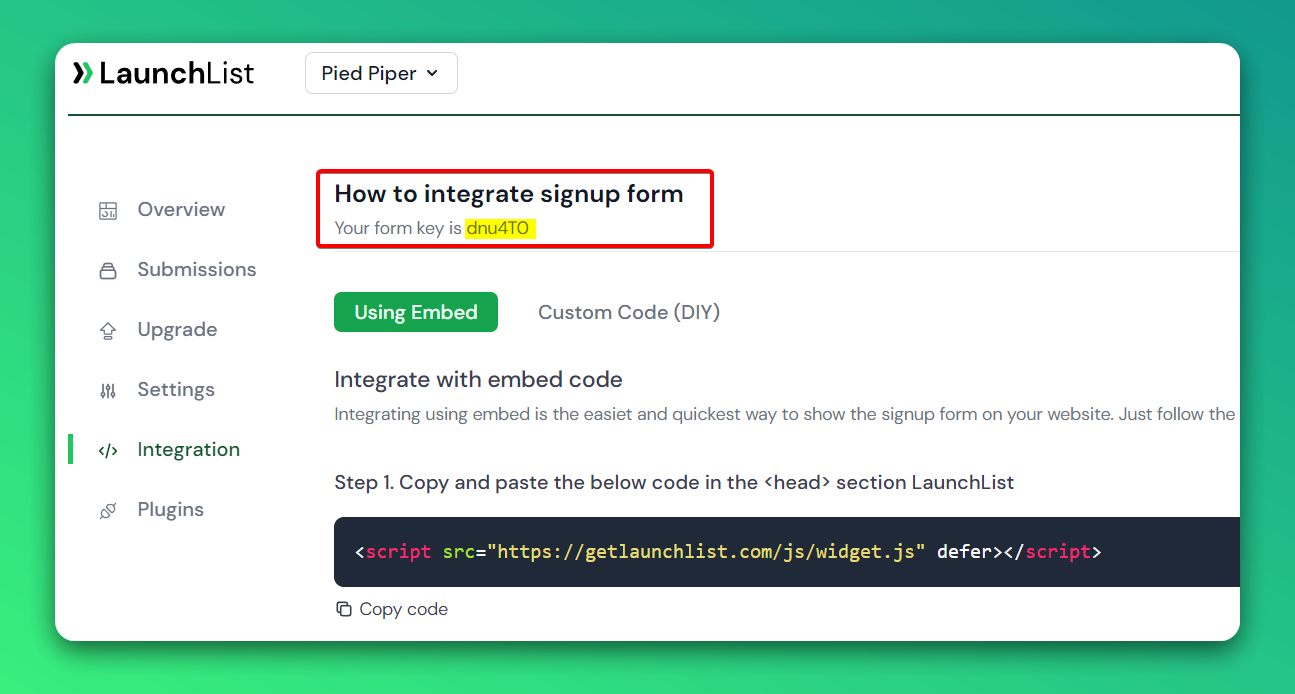
To integrate the embed widget on the Webflow website, first, you need a LaunchList form key which you can get from the integration page.
Embed Widget
Step 1 - Add a widget script into <head> section
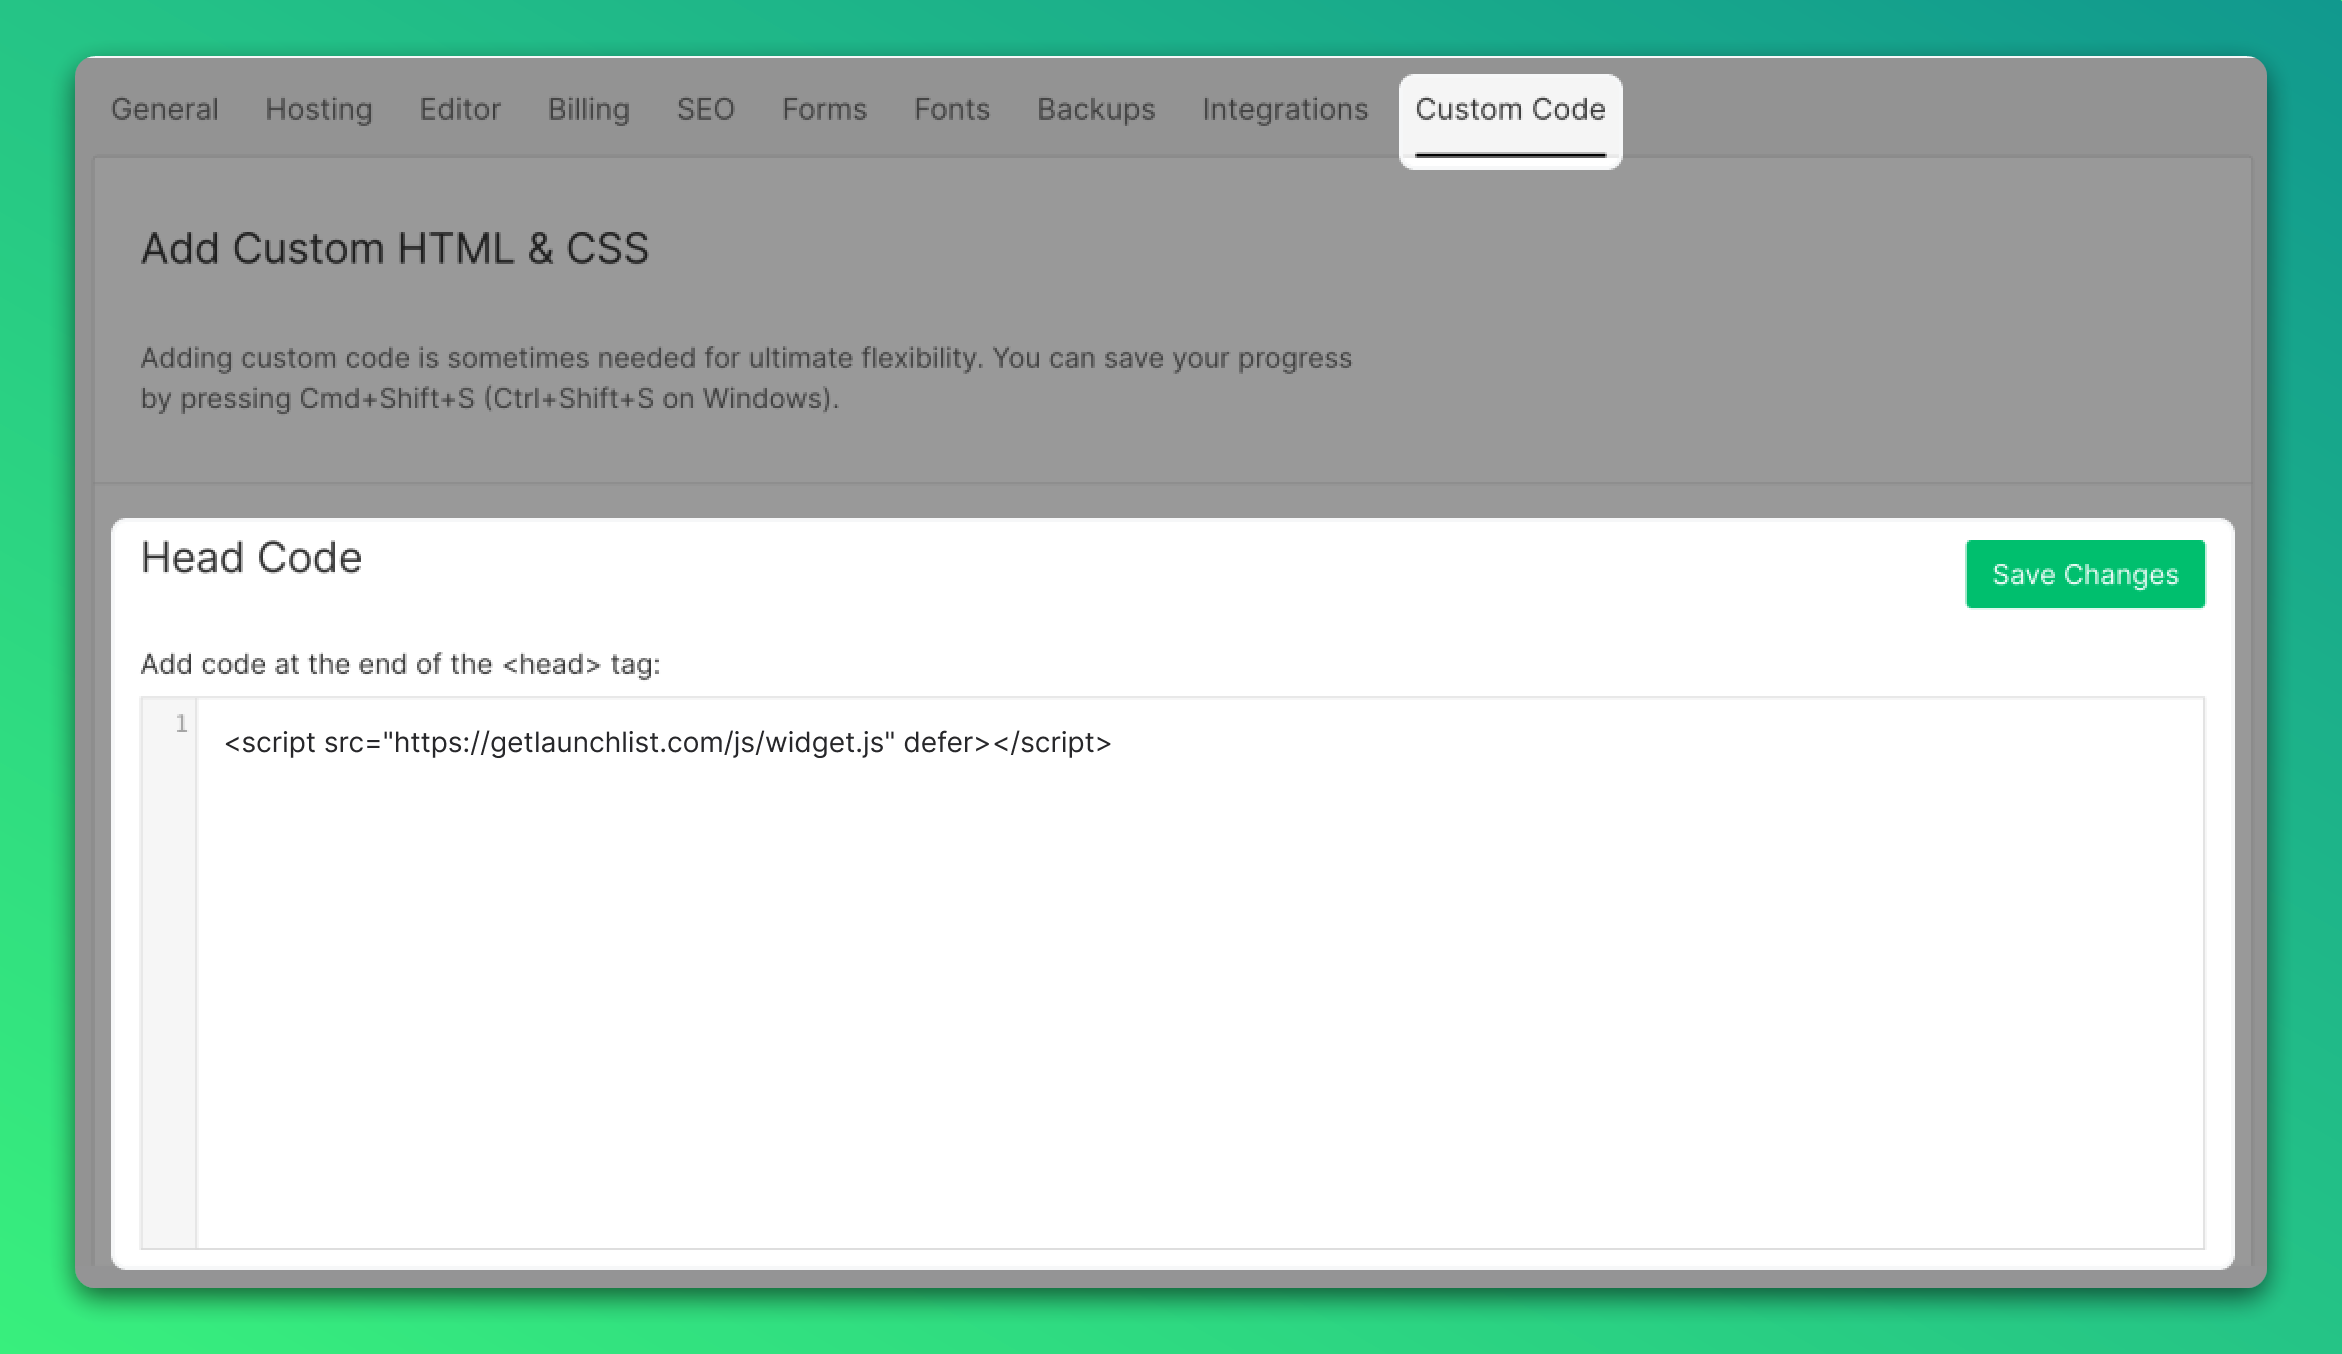
In your Webflow dashboard, go to Project settings > Custom Code, paste the below script into the Head Code section and save the changes. Or follow the instruction provided by Webflow.
<script src="https://getlaunchlist.com/js/widget.js" defer></script>
Step 2 - Add the form code into the Webflow embed element
- Go to Webflow designer
- Open the Add panel and add an Embed element to the Webflow canvas
- Paste the below code and save the modal
- Make sure you have replaced the FORM_KEY with your key from Step 0
<div class="launchlist-widget" data-key-id="FORM_KEY" data-height="180px"></div>

- Once saved, you'll see the widget on your Webflow website. Publish the changes to make it live.
Custom Form
Step 1 - Add a widget script into <head> section
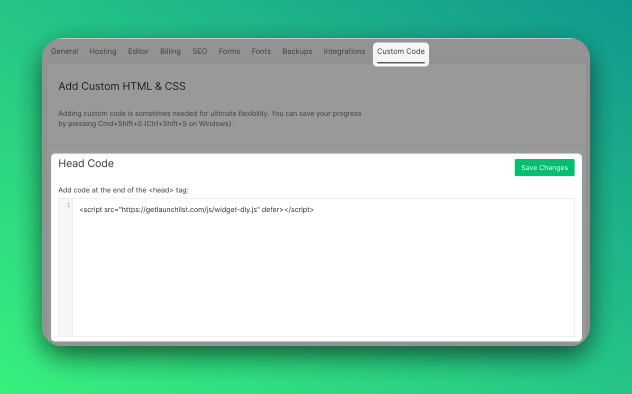
In your Webflow dashboard, go to Project settings > Custom Code, paste the below script into the Head Code section and save the changes. Or follow the instruction provided by Webflow.
<script src="https://getlaunchlist.com/js/widget-diy.js" defer></script>
Step 2 - Create a form in Webflow designer
On a designer canvas, click on the plus button to Add panel (A) and add a Form Block from the Forms section
 Drag a Form block onto the canvas where you want the form to appear.
 Or follow this tutorial to create a basic form. You can customize however you like. You can ignore the video after 2.30 minutes (Step 4. Success & error and Step 5. Form Submissions).
YouTube Link
Or follow this tutorial to create a basic form. You can customize however you like. You can ignore the video after 2.30 minutes (Step 4. Success & error and Step 5. Form Submissions).
YouTube Link
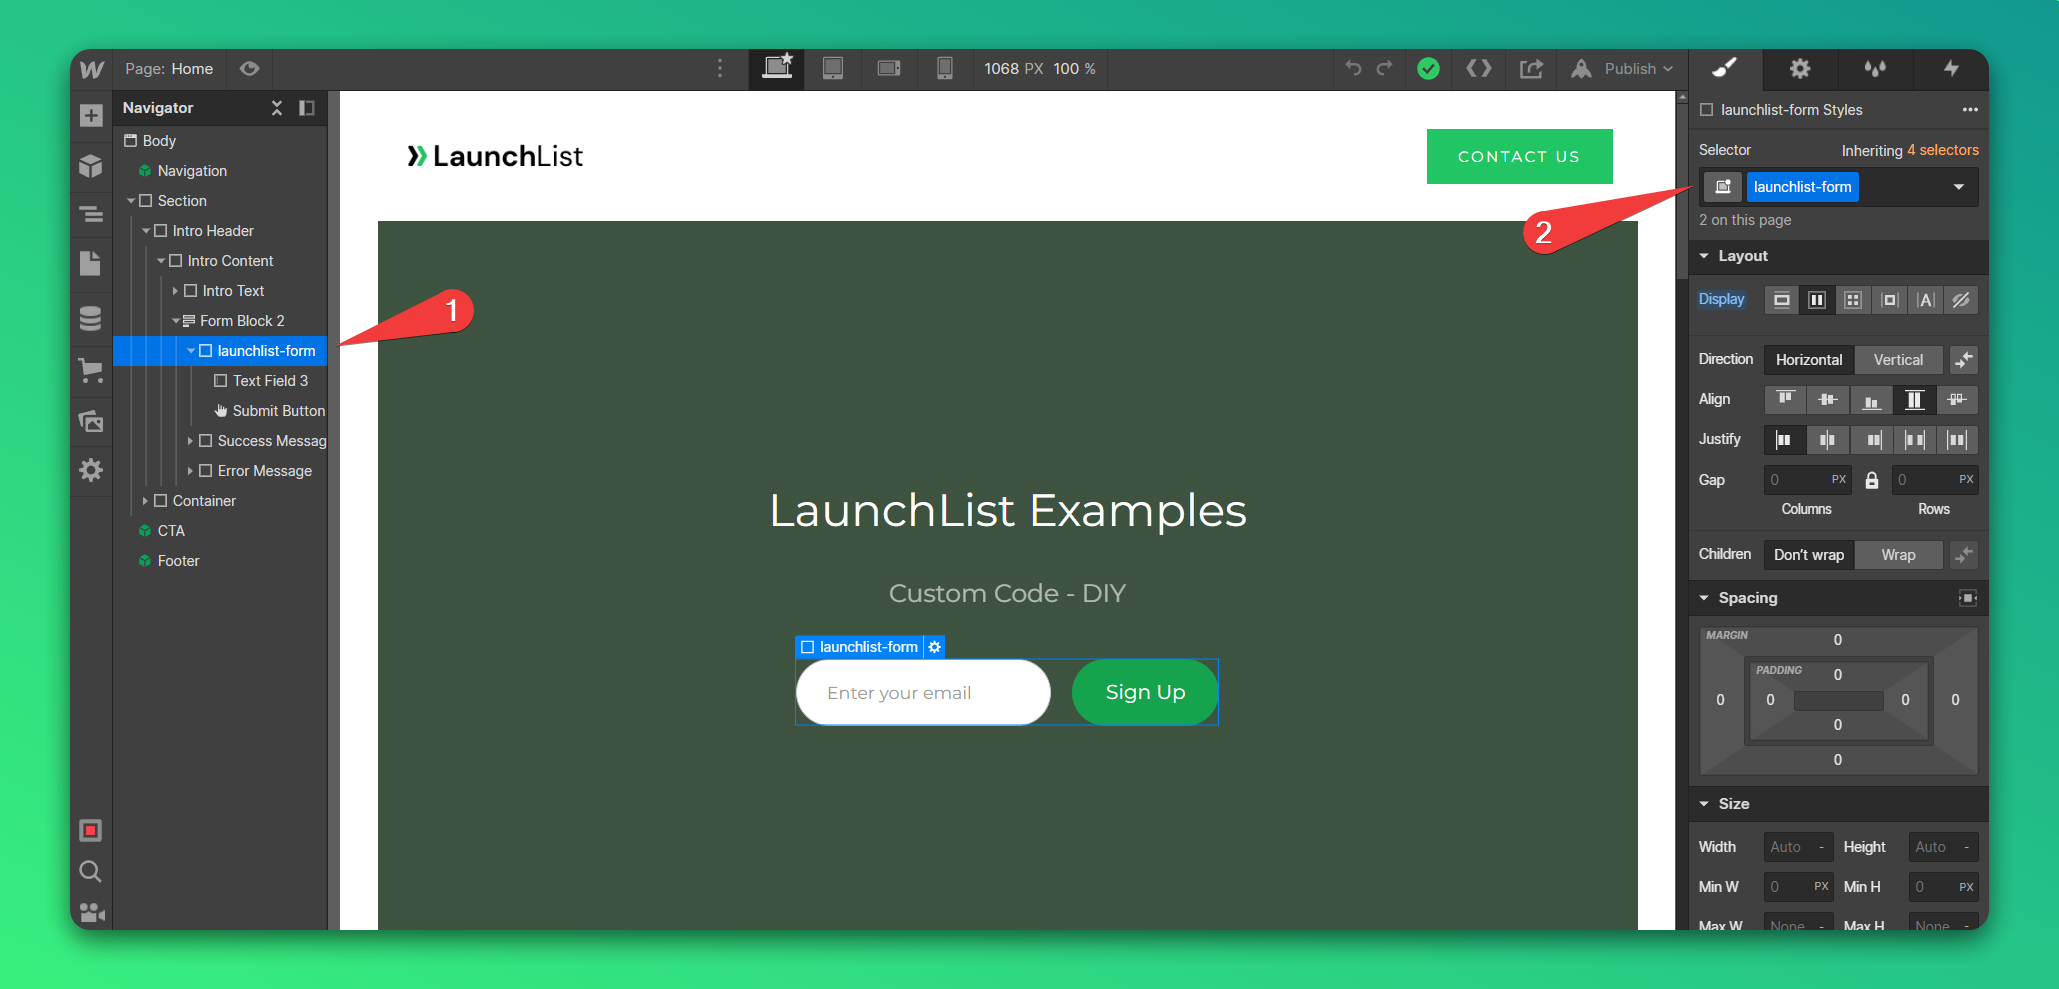
Step 3 - Add class to form
- Select your form from the elements navigator
- On the right sidebar, add a class launchlist-form on your form
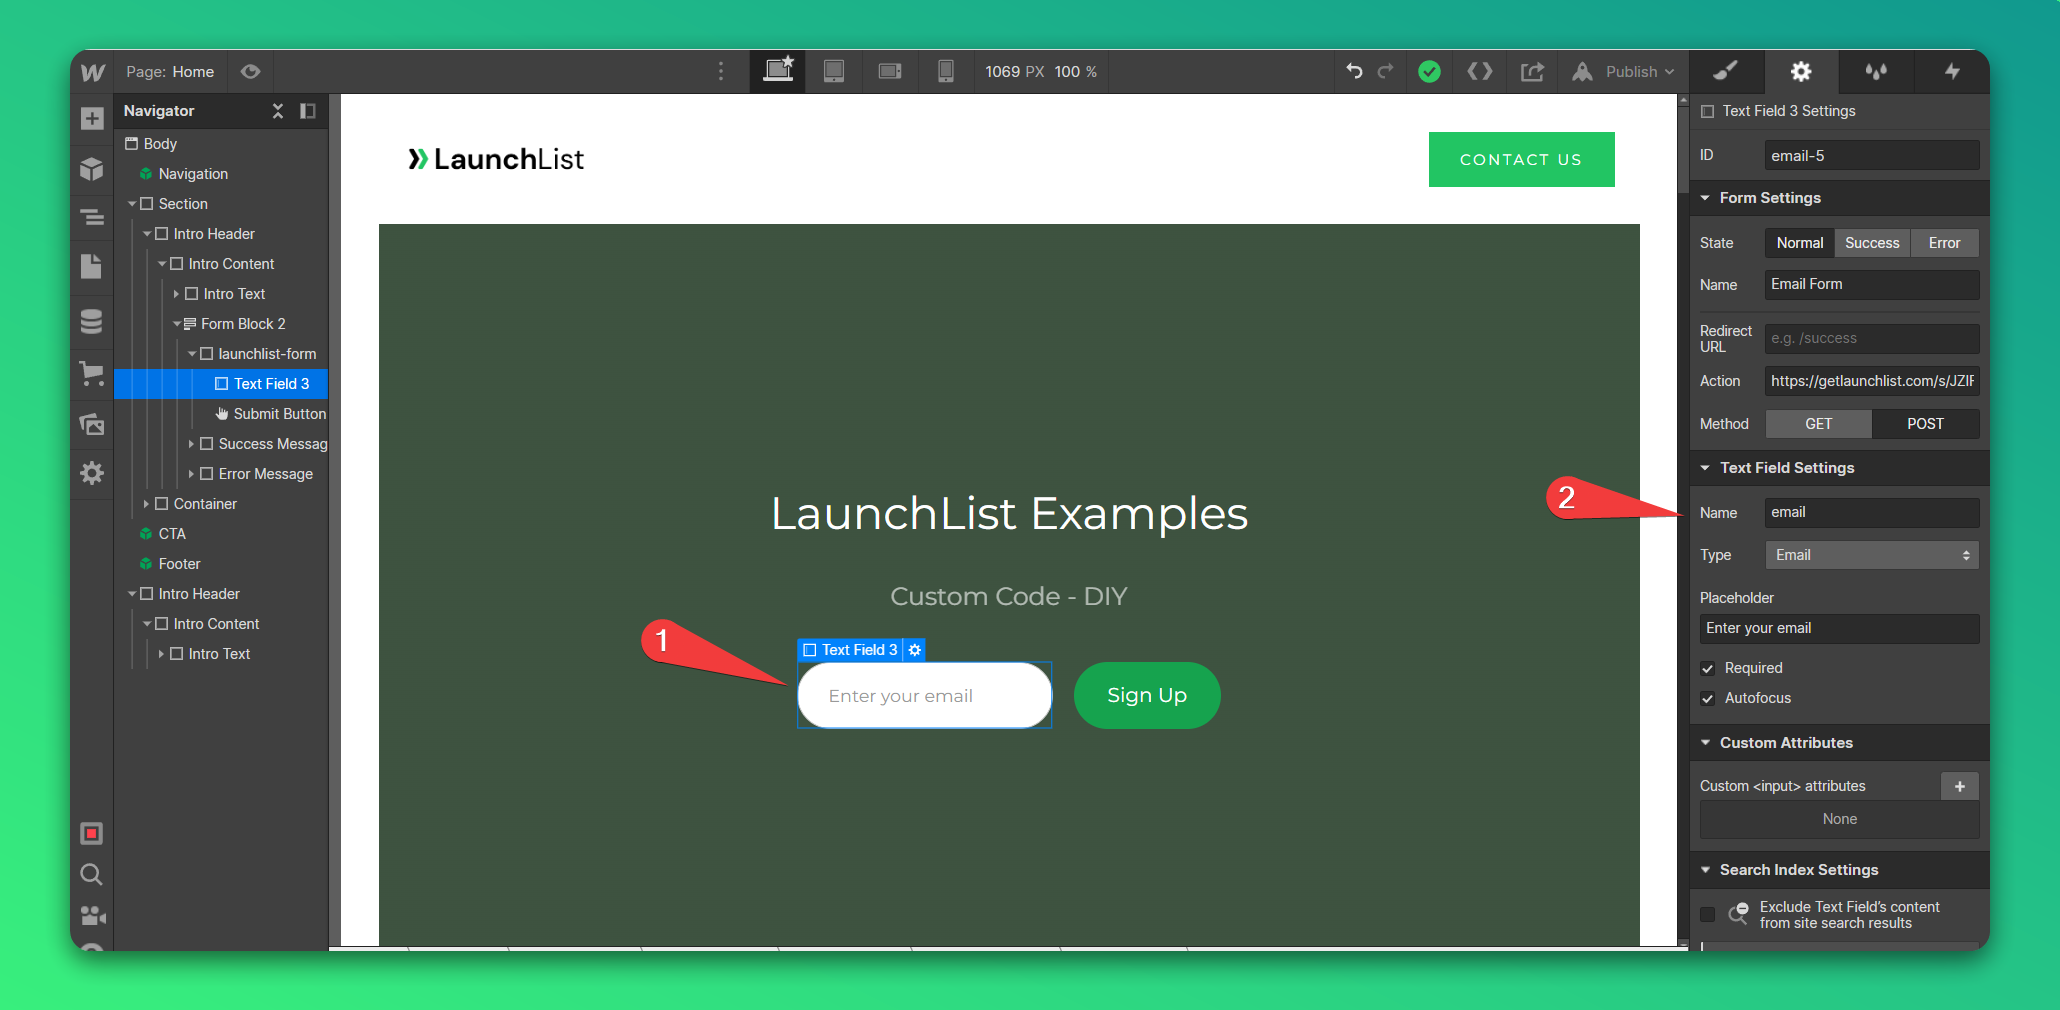
Step 4 - Set input fields name
- Select your form input from the designer canvas
- On the right sidebar, in Text Field Settings set Name of email input to email
- If you are using multiple fields, make sure you have a unique Name for each input
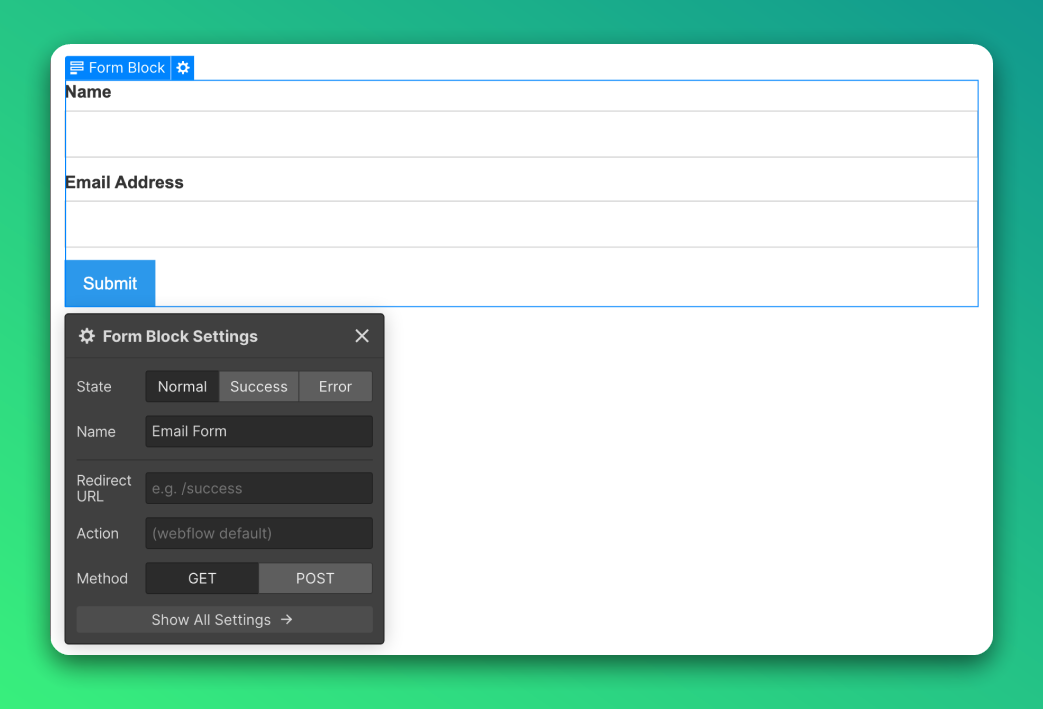
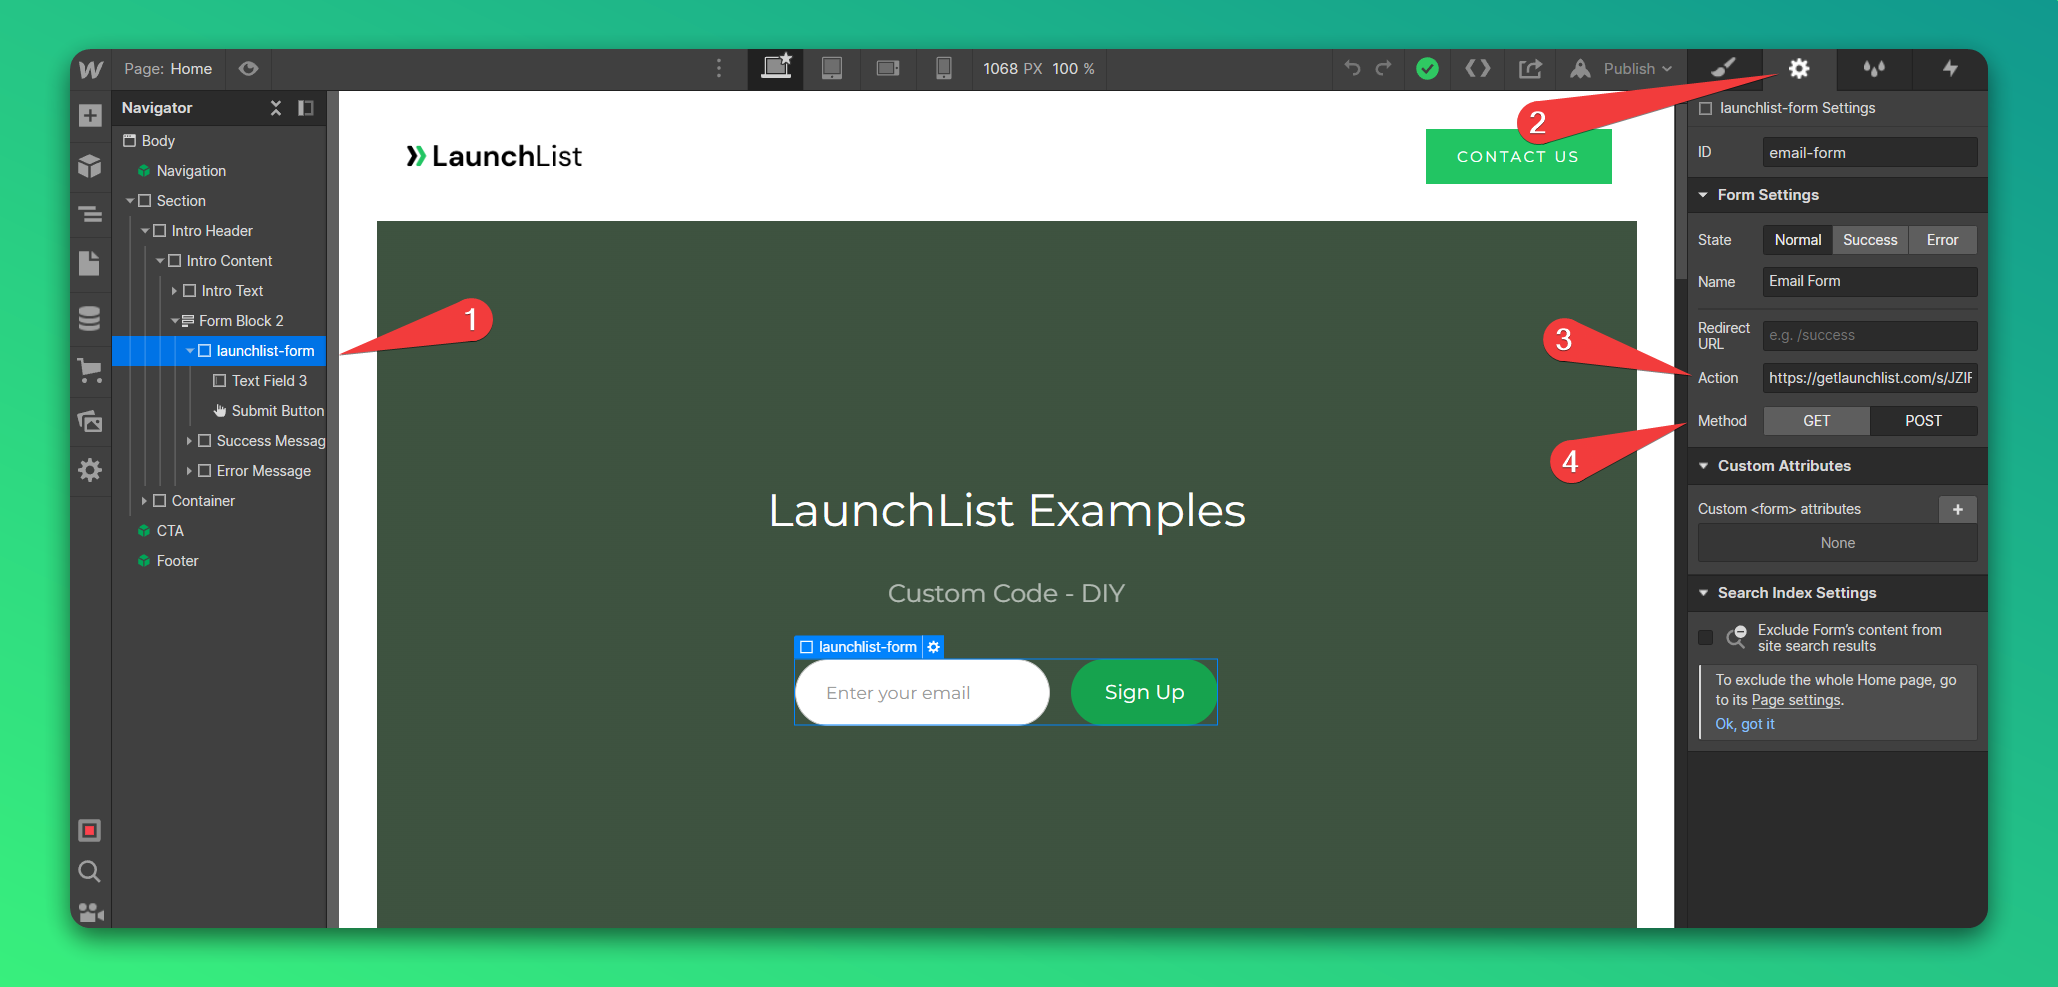
Step 5 - Point form action endpoint
- Select your form from the elements navigator
- Click on the Settings icon on the right sidebar
- On the Form Settings panel enter the below URL. Make sure, you replace the FORM_KEY with your form key from Step 0
https://getlaunchlist.com/s/FORM_KEY
- Choose the method to POST
Once saved, you'll see the widget on your Webflow website. Publish the changes to make it live.
GIF instruction
Why use LaunchList with Webflow?
Webflow is the go-to site builder for founders and designers who want full visual control. LaunchList pairs with it natively — drop in two lines of code and your Webflow site collects pre-launch signups with viral referral loops, position leaderboards, and spam protection built in.
What you get:
- Viral referral program — every signup gets a unique referral link that moves them up the waitlist
- Fraud detection — disposable email blocking, MX validation, and behavioral scoring on every submission
- Real-time leaderboard — shows your top referrers and drives organic sharing
- CSV export — download your full list any time
- Free plan — up to 100 submissions, no credit card required