Integrate Widget
Installing the LaunchList widget only takes a few minutes! We have multiple ways to install it on your website. Embed widget and Custom Form. Both methods are quick, customizable, and easy to integrate.
Embed Widget
Integrating using embed is the easiest and quickest way to show the signup form on your website. You only need two lines of code to show the widget on your website. Embed works by loading the iFrame form on your website.
When to use the embed widget?
- You only need to collect your Name and Email
- You want to launch as quickly as possible
- You don't need lots of customization
- You don't like to code
How to integrate Embed Widget?
These steps work on all frameworks and platforms. You only need to add the widget script to the <head> and the form <div class="launchlist-widget"> to where you want the form to appear.
If you want you can refer to the individual platform specific guide for detailed instructions.
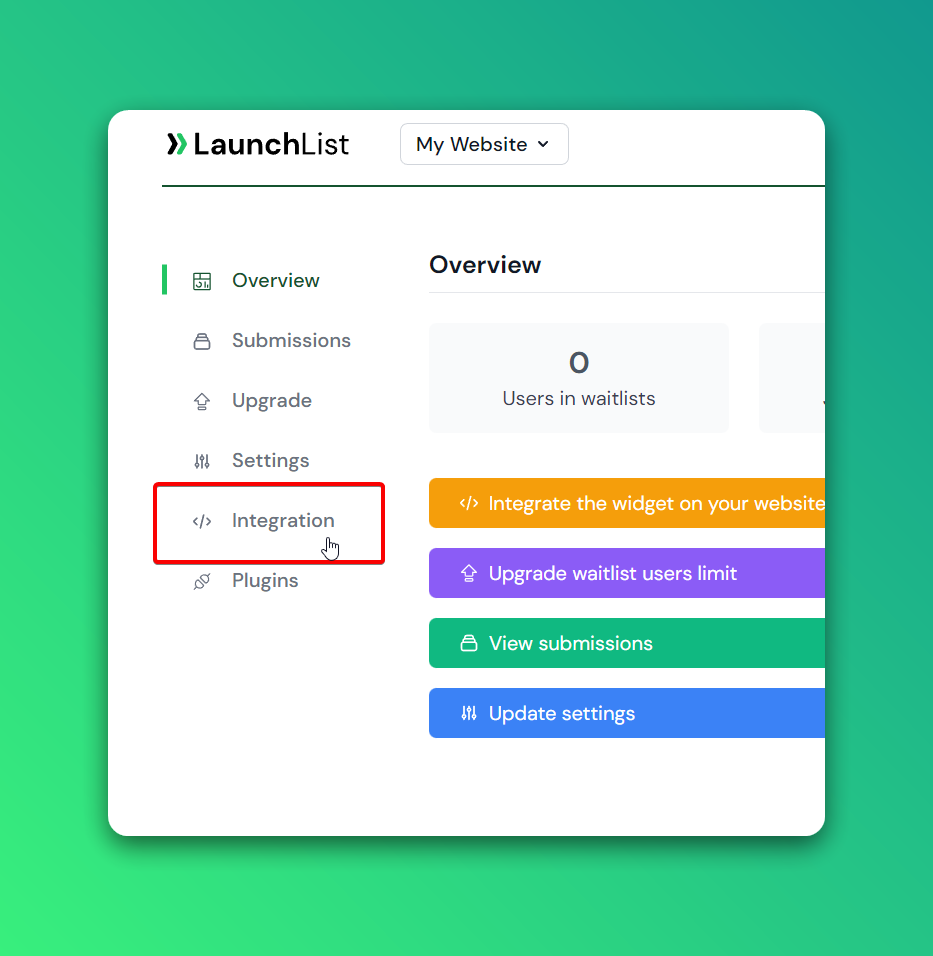
Step 1. Go to the integration page
When you're on your waitlist overview page. Click the Integration link on the sidebar menu to go to the integration page.
 Step 2. Get the widget script
Copy the widget script highlighted in the below image and paste it into your website <head> section.
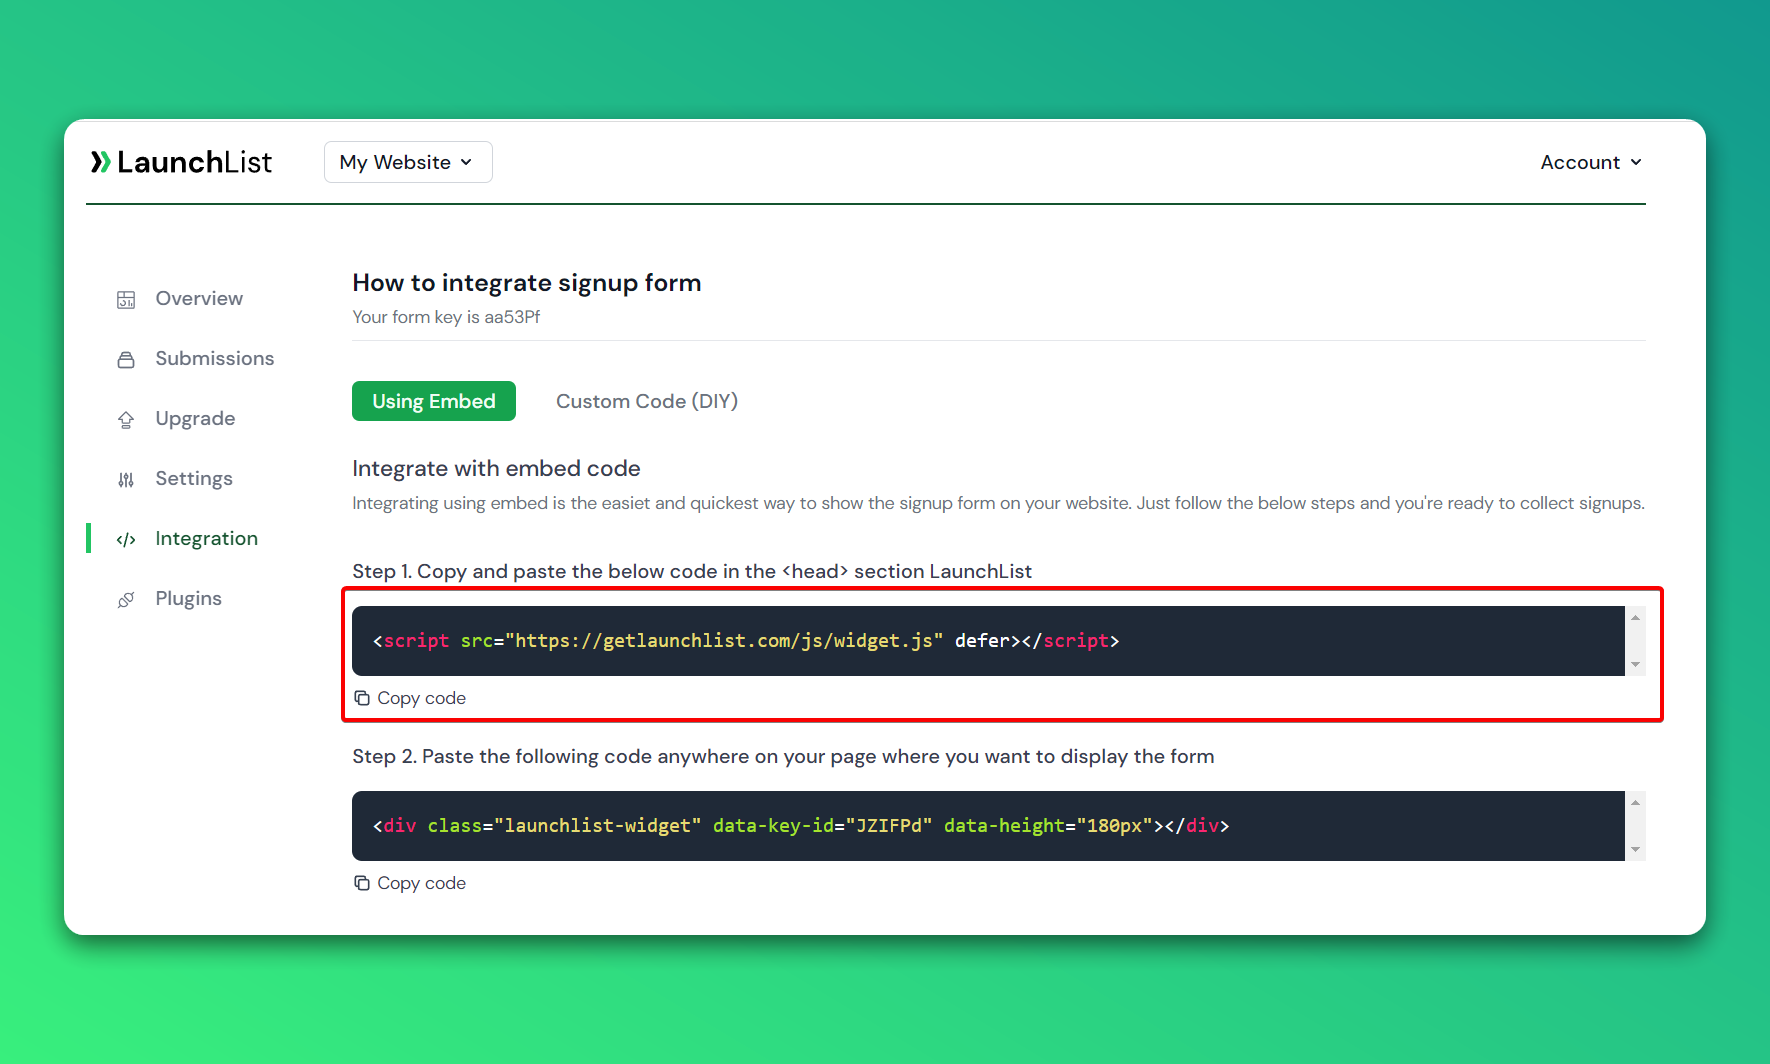 Alternatively, you can copy/paste the below code.
<script src="https://getlaunchlist.com/js/widget.js" defer></script>
Step 3. Copy the widget form
Copy the widget form highlighted in the below image and paste it anywhere on your page where you want to display the form.
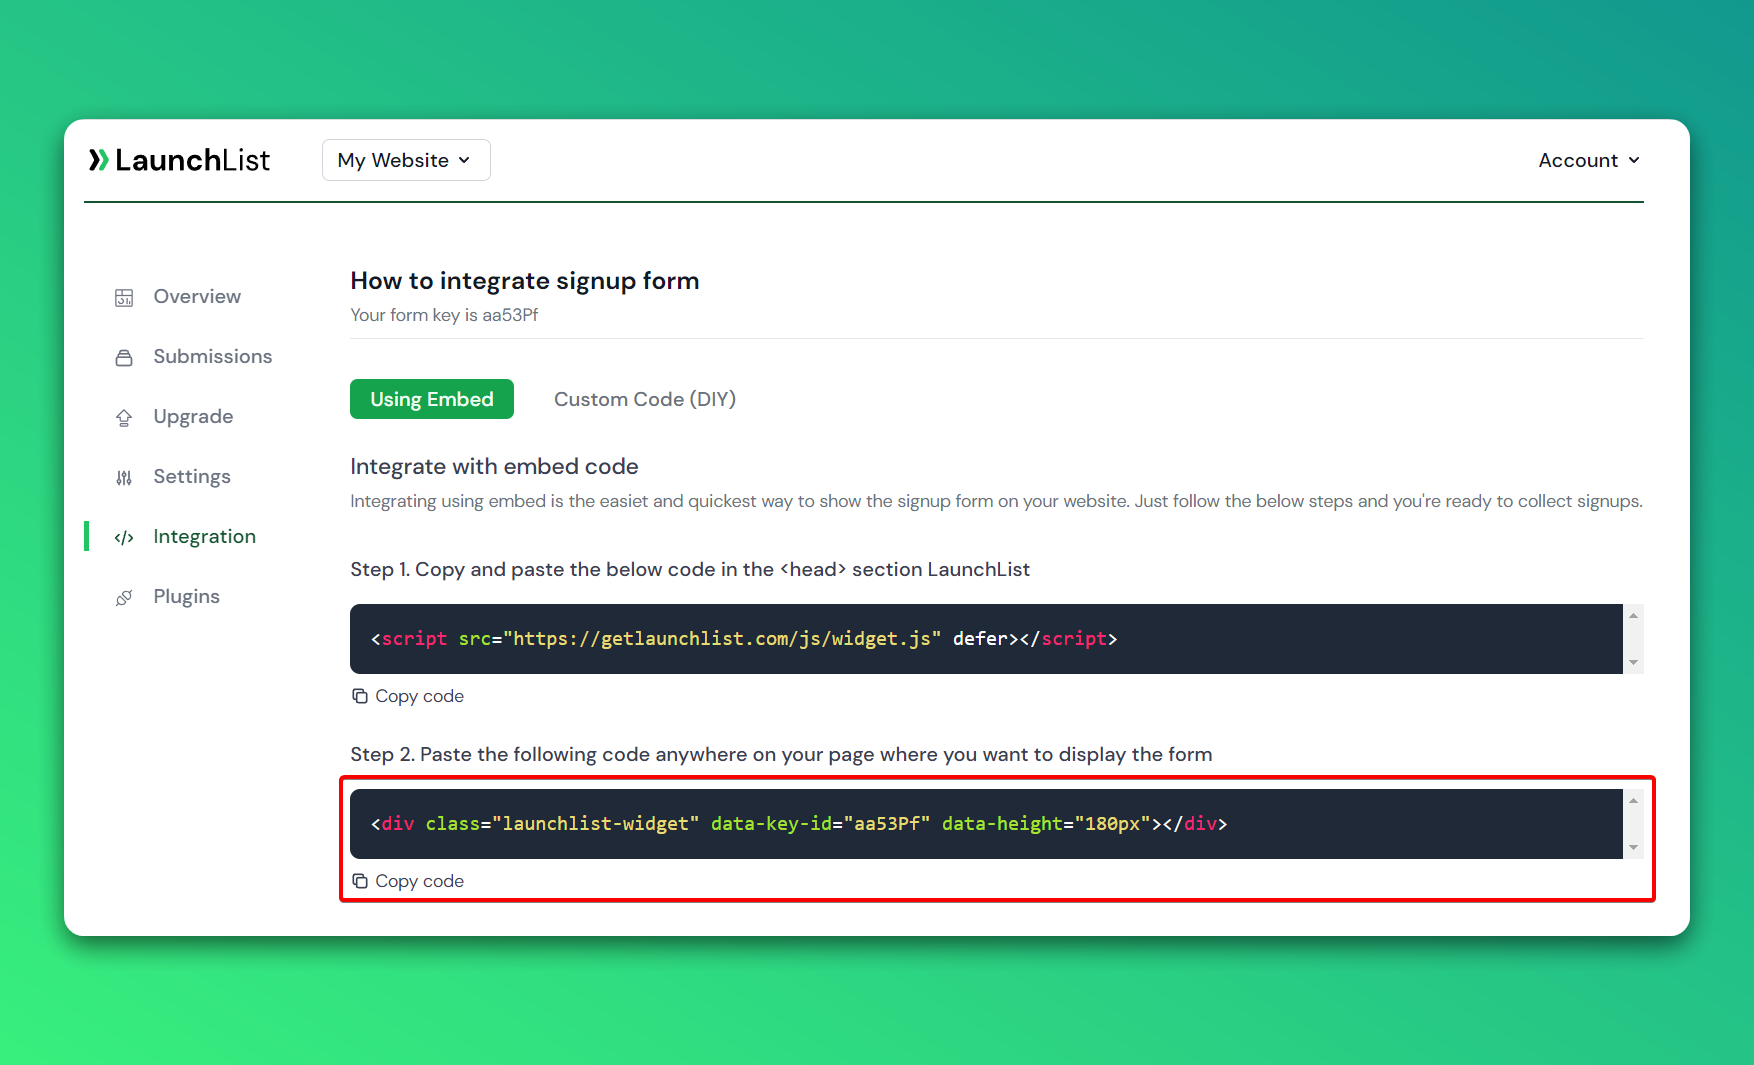 Alternatively, you can copy/paste the below code. Make sure you replace the FORM_KEY with your form key. You can find your form key below the title.
<div class="launchlist-widget" data-key-id="FORM_KEY" data-height="180px"></div>
The above code will render the iframe where you paste the code. You can adjust the height of your widget by changing the value in data-height="180px".
Custom Form
This is an advanced way to build the widget with custom code. You can design the widget however you want. Follow the below steps to make your widget. Please note this is the naked version and you have to add your CSS to customize the look and feel of the widget.
When to use the Custom Form?
- You need to control the granular details of your form
- You want to customize everything in your form
- You are a developer and can code
- You are a no-code developer and can create a form in a no-code builder
- You want to collect extra data from input fields
How to integrate using a Custom Form?
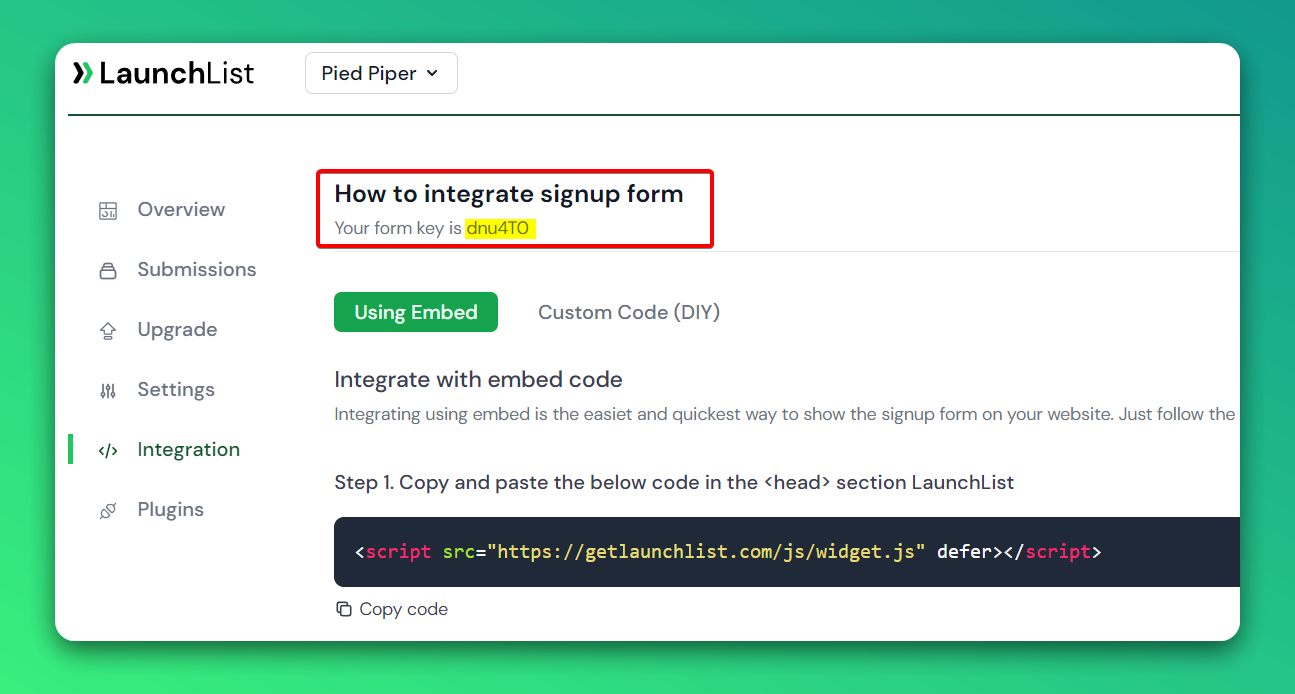
Step 1. Get your form key
The form key is essential for the form to process data. Without a key, the form will not work. To get the form key click the Integration on the sidebar navigation.
Once you're on the integration page, look for the "Your form key is ABC123" text below the page title. Copy the form key, we will use it later when integrating the widget.
 Step 2. Create your HTML form and replace the form's action endpoint with the one below.
- Make sure your form has a class name "launchlist-form" and the method is set to "POST".
- Make sure you update your copied form key in the below code with FORM_KEY.
- Make sure your email input name attribute is set to "email".
- To collect extra data create a new input and make sure you set the name attribute.
<form class="launchlist-form" action="https://getlaunchlist.com/s/FORM_KEY" method="POST">
    <input name="name" type="text">
    <input name="email" type="email">
    <button type="submit">Join Waitlist</button>
</form>
Step 3. Add script to track the referrals
This step is important so make sure you add the below script to your website <head> section.
<script src="https://getlaunchlist.com/js/widget-diy.js" defer></script>