# How to install LaunchList on WordPress
> Add a LaunchList signup form to WordPress with the plugin, or paste the embed into a Custom HTML block, a theme template or a site-wide header script.
Source: https://getlaunchlist.com/help/docs/integrations/wordpress
---
What the LaunchList plugin adds, what it sends and whether you need it are on the
[WordPress waitlist plugin](https://getlaunchlist.com/plugins/wordpress) page. This guide is the
setup: the plugin first, then the embed pasted by hand, which needs no plugin, then the fixes.
## The LaunchList plugin (recommended)
1. In WordPress, open **Plugins → Add New Plugin**, search for **LaunchList**, then click **Install Now** and **Activate**. The plugin's page in the directory is [wordpress.org/plugins/launchlist](https://wordpress.org/plugins/launchlist/).
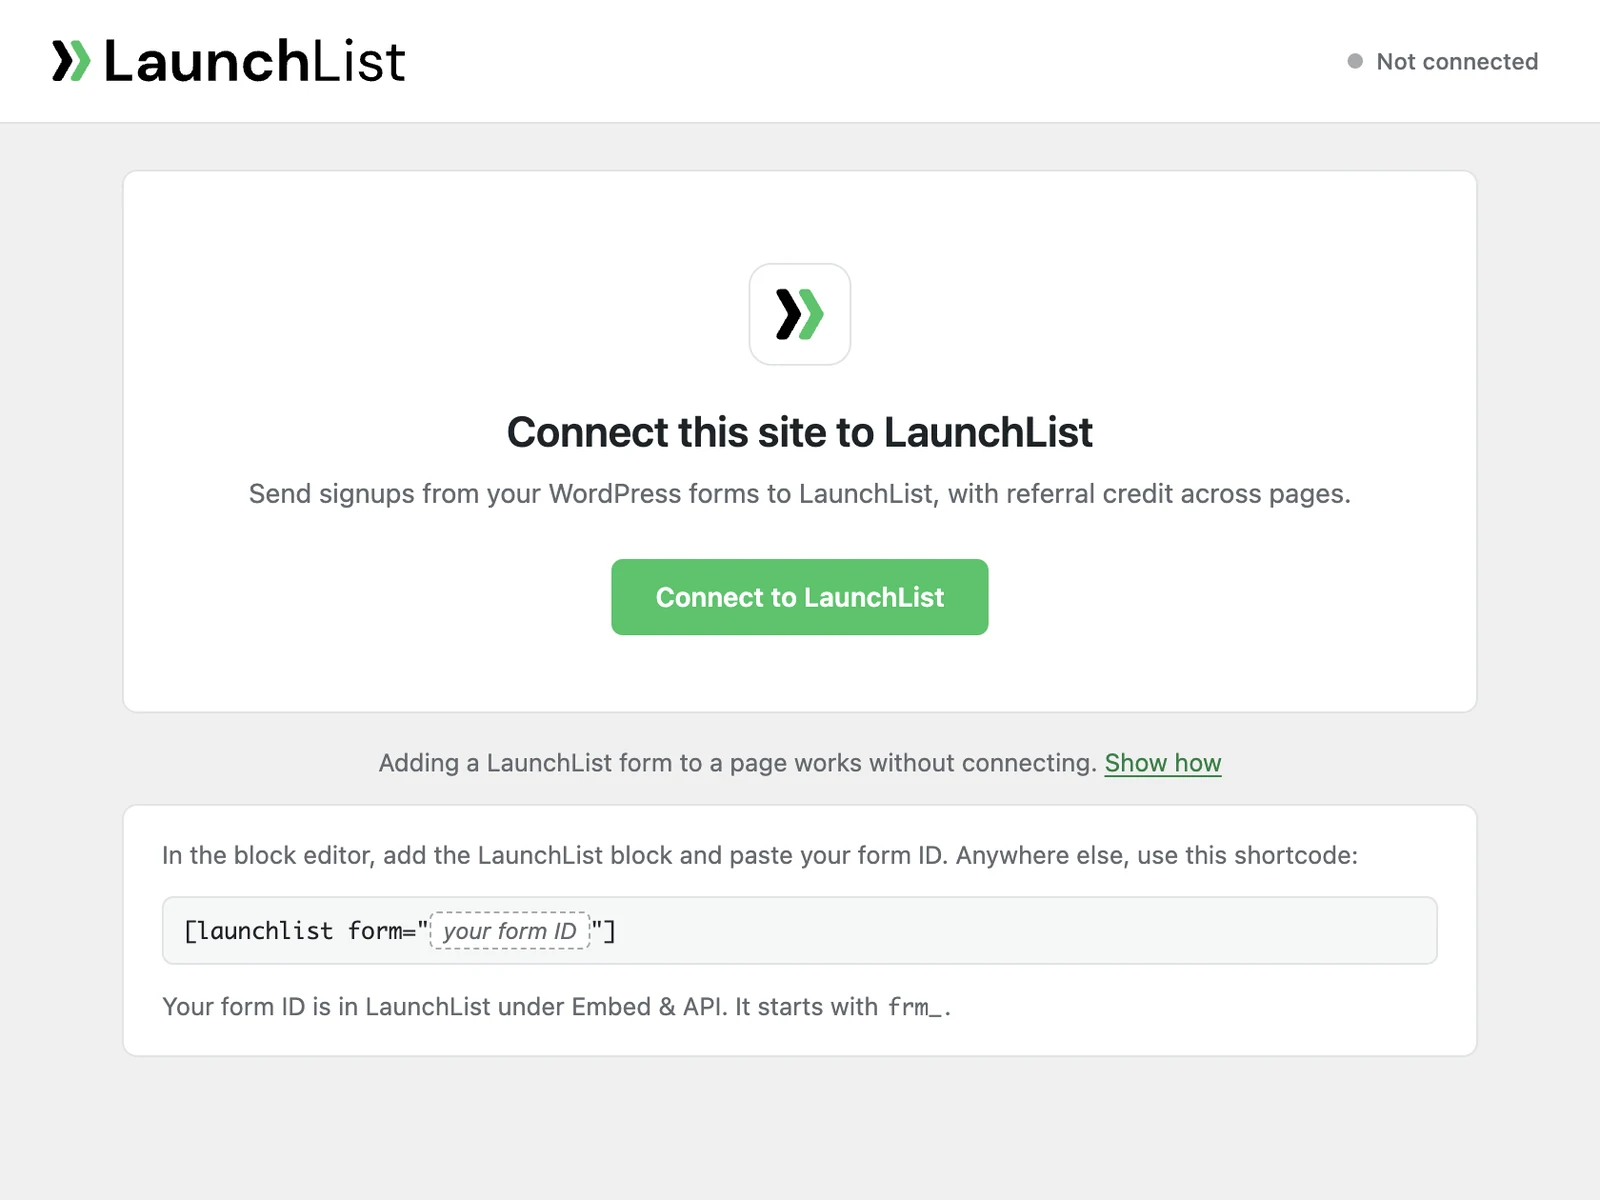
2. Open **LaunchList** in the WordPress menu and click **Connect to LaunchList**. Sign in to your LaunchList account (you need one to connect a site), choose the workspace the site belongs to and click **Connect**. You do this once per site, and the screen then says **Connected to** your workspace.
3. Edit a page, click **+** and add the **LaunchList form** block. Choose your form in the **Form** list.
4. In a page builder or the classic editor, use the shortcode instead, with your form ID from **Embed & API → Your website**: `[launchlist form="frm_8Kd2Qm4Rp9xy"]`.
5. **Publish**, or preview the page, then join with your own email to see the signup arrive in **Audience**. A signup made in a preview is real.
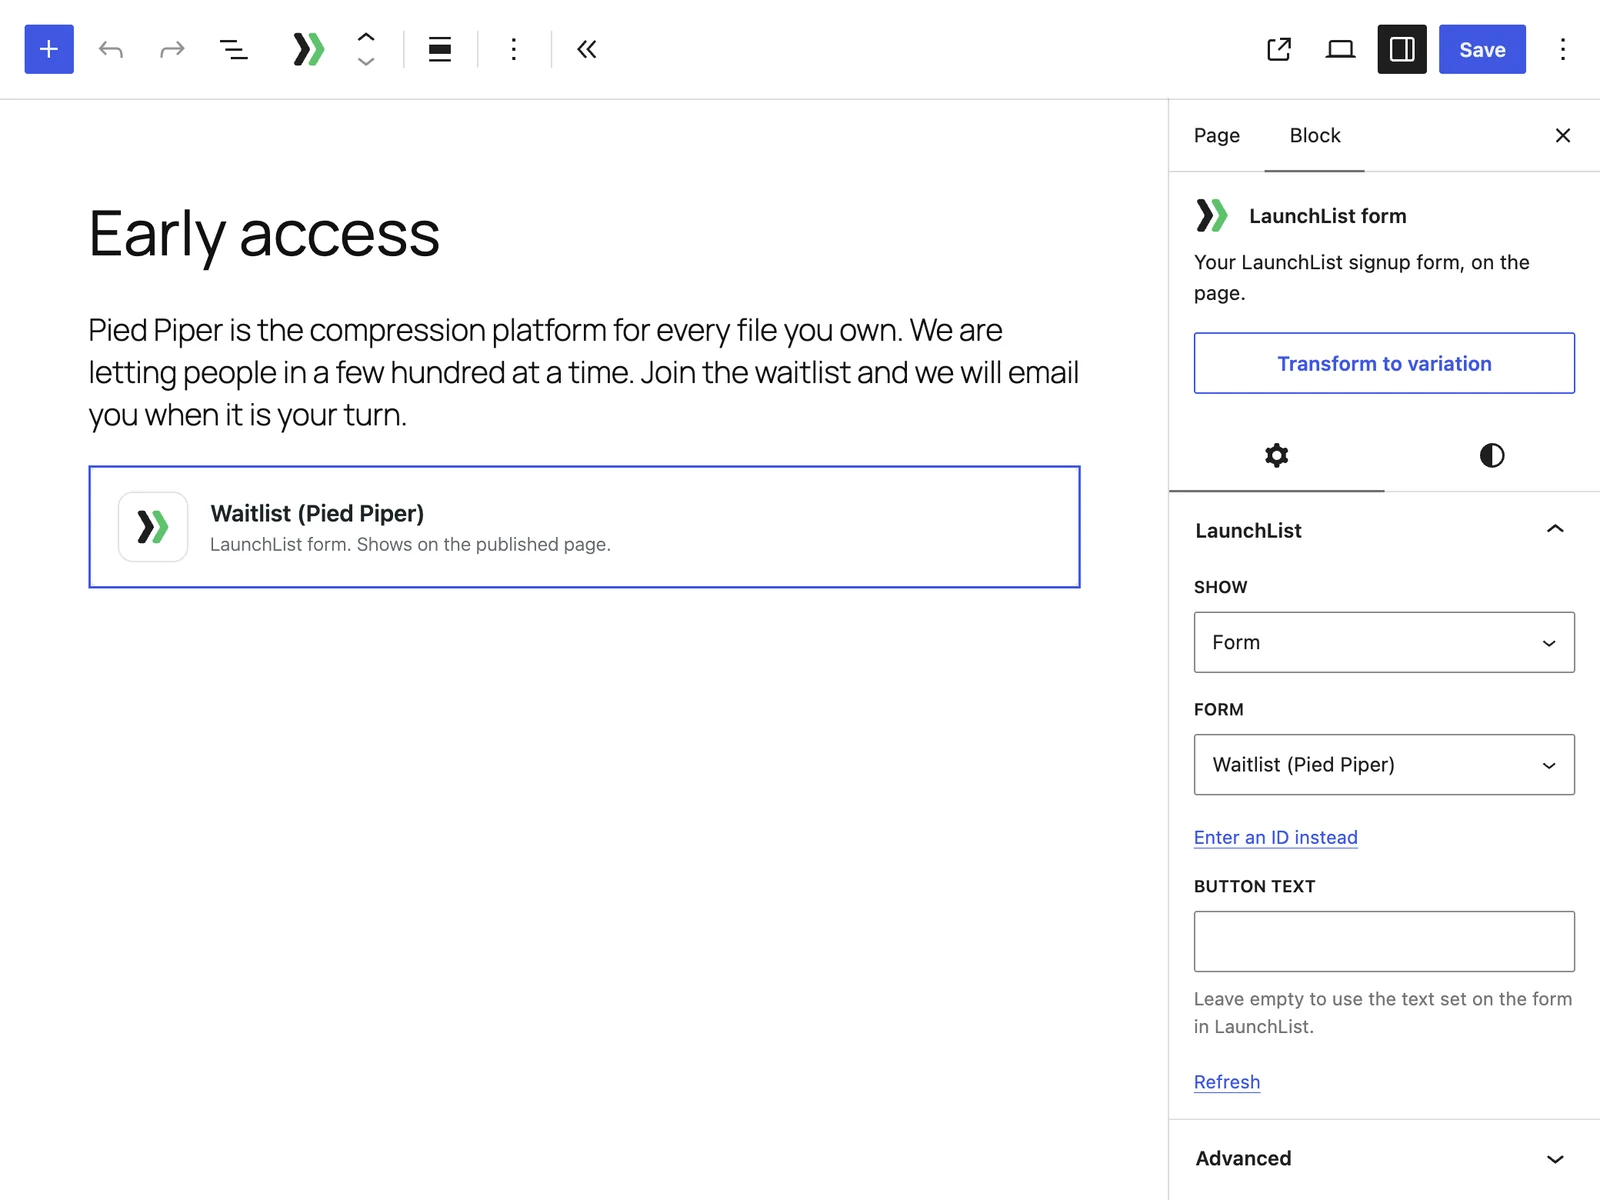
In the block's settings, **Show** switches between **Form**, **Popup button**, **Widget** and
**Updates**; the inserter also offers each as its own variation, **LaunchList form**, **LaunchList
popup button**, **LaunchList widget** and **LaunchList updates**. A form or a popup button takes a
form: choose it in the **Form** list, which names each form with its project, or click **Enter an ID
instead** and paste its form ID. A widget or updates takes a **Project**, and a widget also takes a
**Widget**: one of yours from the list, or a type, **counter**, **leaderboard**, **milestone** or
**countdown**. A form's **Button text** replaces the button text set on the form in LaunchList. A
popup button has its own **Button text**, and its **Opens as** is a window in the middle of the page
or a panel from the side. After you add a form in LaunchList, click **Refresh** in the block's
settings to see it in the list.
In the editor the block shows a card, so nothing typed there becomes a signup. The form itself
appears on the published page and in a page preview, and a signup made in a preview is real. The
block has no style settings: its look is the design you pick in the LaunchList form editor, under
**Design**. The shortcode
and the block work without connecting your site, because the embed is public; the lists in the
block's settings need the connection, and without it you paste the form ID.
For a shortcode, open **Add LaunchList to a page** at the bottom of the LaunchList screen. It lists a
**Form**, **Popup**, **Widget** and **Updates** shortcode for one of your forms, each with a copy
button, and a list to switch forms when you have more than one. The widget shortcode shows a signup
counter: put leaderboard, milestone or countdown in place of counter for the others.
Once your site is connected, the plugin loads LaunchList on every page, so a referral code is
remembered for 90 days and follows a visitor from page to page. This is on by default. To load
LaunchList only on pages with a LaunchList block or shortcode, clear **Load LaunchList on every page**
at the foot of **Your forms** on the LaunchList screen and click **Save**. Where a consent plugin that
uses the WP Consent API is active, it loads on every page only for visitors who allowed marketing
cookies.
### Send your WordPress forms
If you already built a form in **Contact Form 7**, **WPForms**, **Gravity Forms**, **Elementor Pro**,
**Fluent Forms**, **Ninja Forms** or **Formidable Forms**, keep it and send its signups to LaunchList.
1. Connect your site, as in step 2 above. Sending your own forms needs the connection.
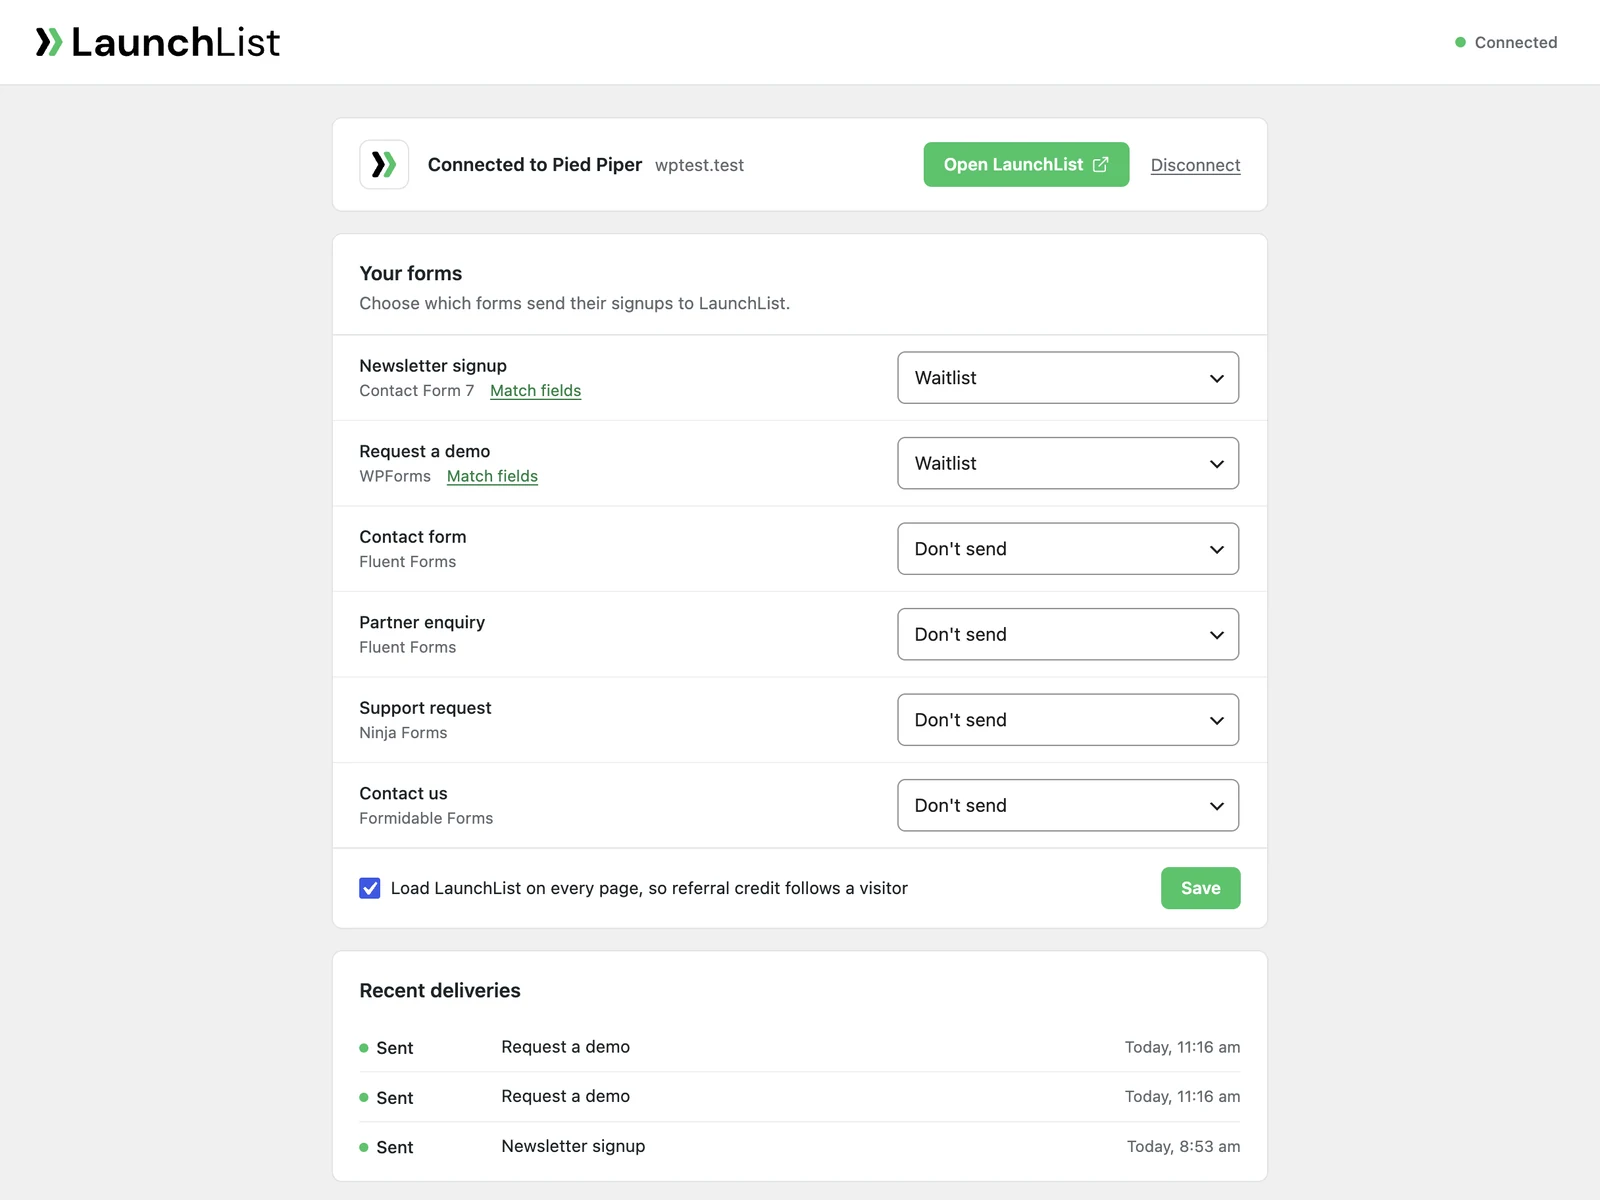
2. On the LaunchList screen, **Your forms** lists every one of your forms with the form plugin it
comes from. Beside the form you want to send, change **Don't send** to the LaunchList form its
signups should go to. The list groups your LaunchList forms by project.
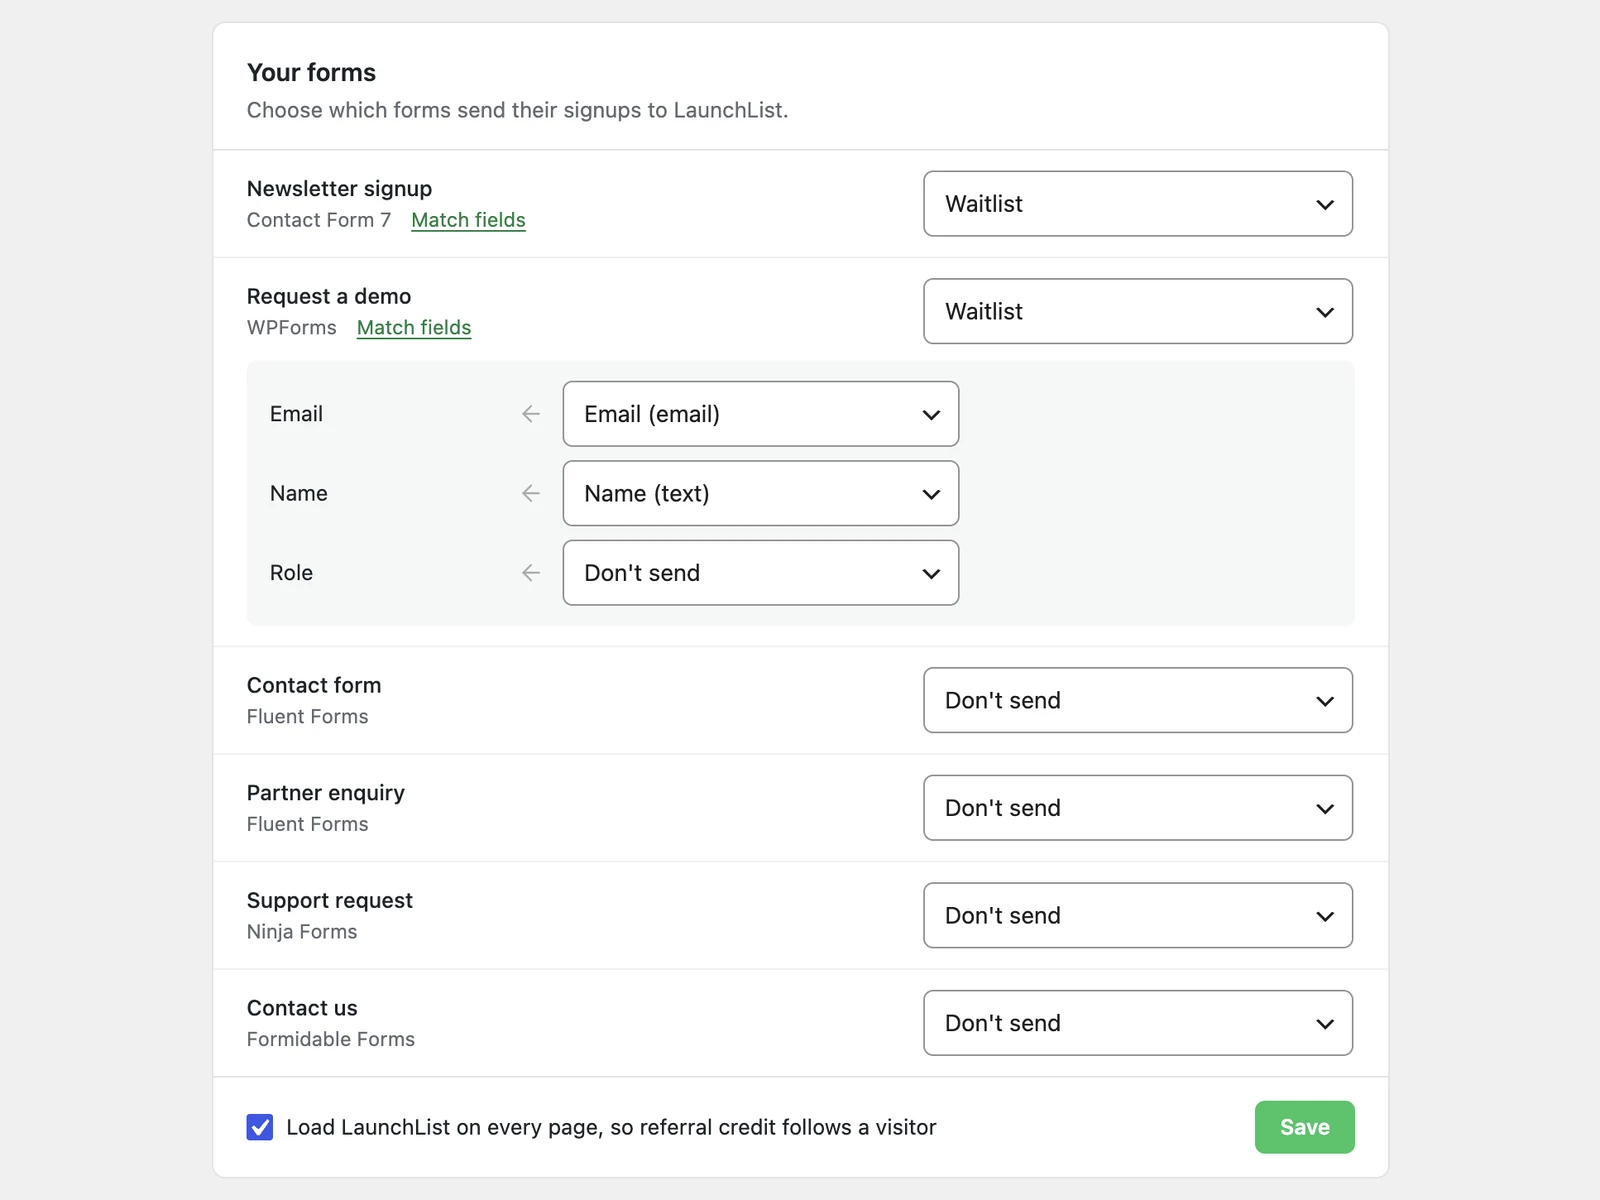
3. Click **Match fields** under the form's name to choose which of your form's fields fills each
LaunchList field. The plugin suggests matches: the first email field, and other fields by name.
**The field LaunchList identifies a person by, usually Email, must be matched**, or LaunchList
refuses the signup, and the row warns you until it is. A LaunchList field left on **Don't send**
stays empty. Your form's fields that fill no LaunchList field are kept with the signup, up to 20,
under a simplified version of their label, as **Input data**.
4. Click **Save**, submit a test signup and check that it arrives in **Audience**. A form you add in
LaunchList appears in the list the next time you open the screen.
Your form plugin keeps working as before: its emails, messages and saved entries do not change, and it
still shows its own success message, so a person's place in line and referral link are not shown
there. Use the block when you want those. LaunchList receives each submission from your server after
your form plugin accepts it. If LaunchList cannot take a signup right away, your site keeps it and
tries again a minute later at first, then up to an hour apart, for 24 hours.
**Recent deliveries** on the LaunchList screen shows what happened to each one: **Sent** when
LaunchList received it, **Kept** when your site kept it to try again, and **Not added** when
LaunchList refused it, with the reason beside it. When signups are waiting, the card says how many,
and **Retry now** tries them again.
To remove LaunchList, click **Disconnect** on the LaunchList screen and confirm, or open **Embed &
API → Your website** in LaunchList and click **Disconnect** beside the site. Your forms stop reaching
LaunchList, blocks and shortcodes keep working, and the signups already in LaunchList stay there. Any
signup still waiting on your site to be sent is deleted. If
the connection is removed in LaunchList, the screen says LaunchList no longer recognizes the site and
offers **Connect again**. A copy of your site made by cloning its database, such as a staging site,
does not send anything in the live site's name; its LaunchList screen offers to connect the copy as a
site of its own. The table at the end of this page covers each message the screen can show.
The methods below do the same by hand, if you would rather not install a plugin.
## The block editor, without the plugin
1. In LaunchList, open **Embed & API → Your website**, choose **WordPress** under **What is your site built with?**, pick your form if you have more than one, and copy the **Inline** snippet it shows.
2. Edit the page or post, click **+**, and add a **Custom HTML** block.
3. Paste the snippet.
```html
```
4. **Publish**. Use the block's **Preview** tab to see it render inside the editor.
That is the whole integration.
## Site-wide, for more than one form
If you plan to use forms, popups or widgets on several pages, load the runtime once in your theme
instead of repeating it in every block.
The plugin does this for you: once your site is connected it loads LaunchList on every page, unless you clear **Load LaunchList on every page** on its screen.
Add this to your child theme's `functions.php`:
```php
add_action('wp_enqueue_scripts', function (): void {
wp_enqueue_script(
'launchlist',
'https://embed.getlaunchlist.com/v1/embed.js',
[],
null,
['strategy' => 'async', 'in_footer' => false],
);
});
```
Then every Custom HTML block only needs the target element:
```html
```
> [!WARNING] Use a child theme
> Editing `functions.php` in a parent theme means your change disappears at the next theme update.
## In a theme template
To place the form in a template file such as `front-page.php` or `footer.php`:
```php
```
With the script enqueued as above, nothing else is needed.
## If your host strips script tags
Some managed WordPress plans and page builders remove `